

WordPress Training Guide
This guide will cover the essentials of using WordPress and the unique custom features we’ve built for you. If you have questions, please reach out to us!
Table of Contents
Training Video
WordPress Basics
The WordPress Dashboard & Left Hand Menu
Toggling Between the Frontend & Backend of the Website
Media
Content
SEO
Menus
Page Details
Full Training Video
Site Access
In the future you may need to grant permissions to others or adjust who can access different parts of your site. Here’s how you can manage user accounts and control site access:
Adding a New User
- Go to “Users” > “Add New.”
- Fill in the user information, including username, email, first name, last name, and password.
- Choose the appropriate role for the user (e.g., Administrator, Editor, Author, Contributor, Subscriber).
- Click “Add New User.”
Editing an Existing User
- Go to “Users” > “All Users.”
- Click on the username of the user you want to edit.
- Make the necessary changes, such as updating the email, changing the role, or resetting the password.
- Click “Update User.”
Deleting a User
- Go to “Users” > “All Users.”
- Hover over the username of the user you want to delete and click “Delete.”
- You will be prompted to reassign or delete the content created by this user. Choose the appropriate option and confirm the deletion.
User Roles and Permissions
Understanding user roles is crucial for managing site access effectively. Here are the default WordPress user roles and their capabilities:
Subscriber: Can manage their own profile and view content. Suitable for membership or subscription-based sites.
Administrator: Full access to all site features, including theme and plugin management, user management, and content creation/editing.
Editor: Can publish and manage posts, pages, and other content types created by any user.
Author: Can publish and manage their own posts.
Contributor: Can write and manage their own posts but cannot publish them. Posts must be approved by an Editor or Administrator.
Logging into WordPress
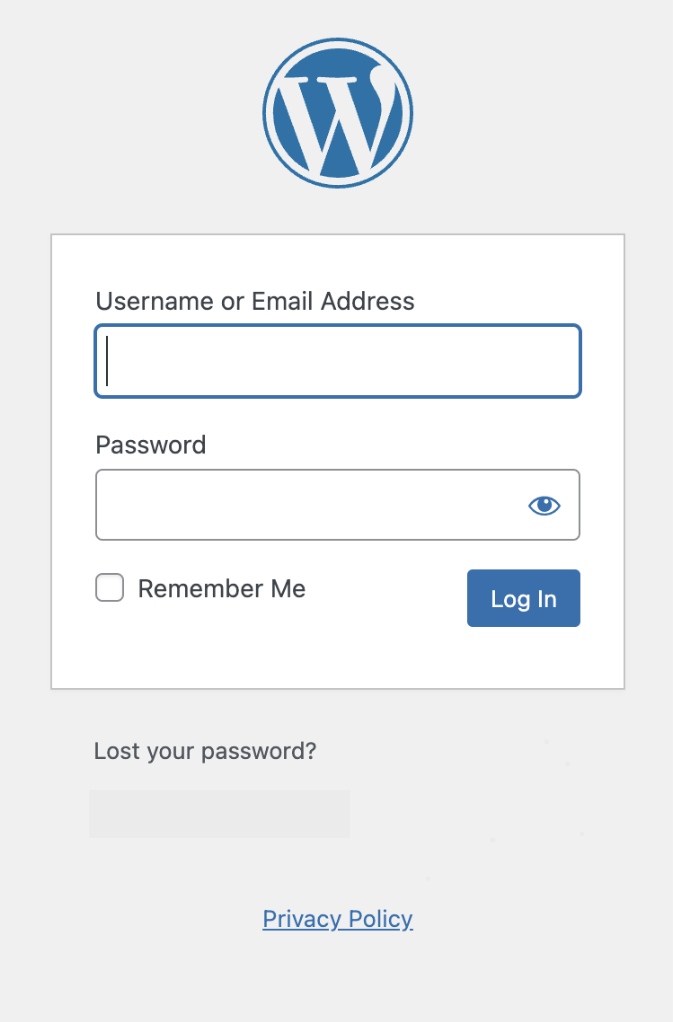
Go to https://ourtrust.org/wp-login.php
Enter your login credentials provided by the administrator.
Once logged in, you’ll be directed to the WordPress dashboard.
If you forget your password in the future, you can use the “Lost your password?” functionality below the login.
The WordPress Dashboard & Left Hand Menu
Once logged in, you will land on the Dashboard Screen. From here you can see many options in your menu along the left side. The main area that you will use to edit is:

Toggling between the Frontend & Backend of the Website
When you are in the backend, click on the house icon on the top left of your screen to toggle between the backend and frontend.
This helps in quickly locating and editing specific pages.

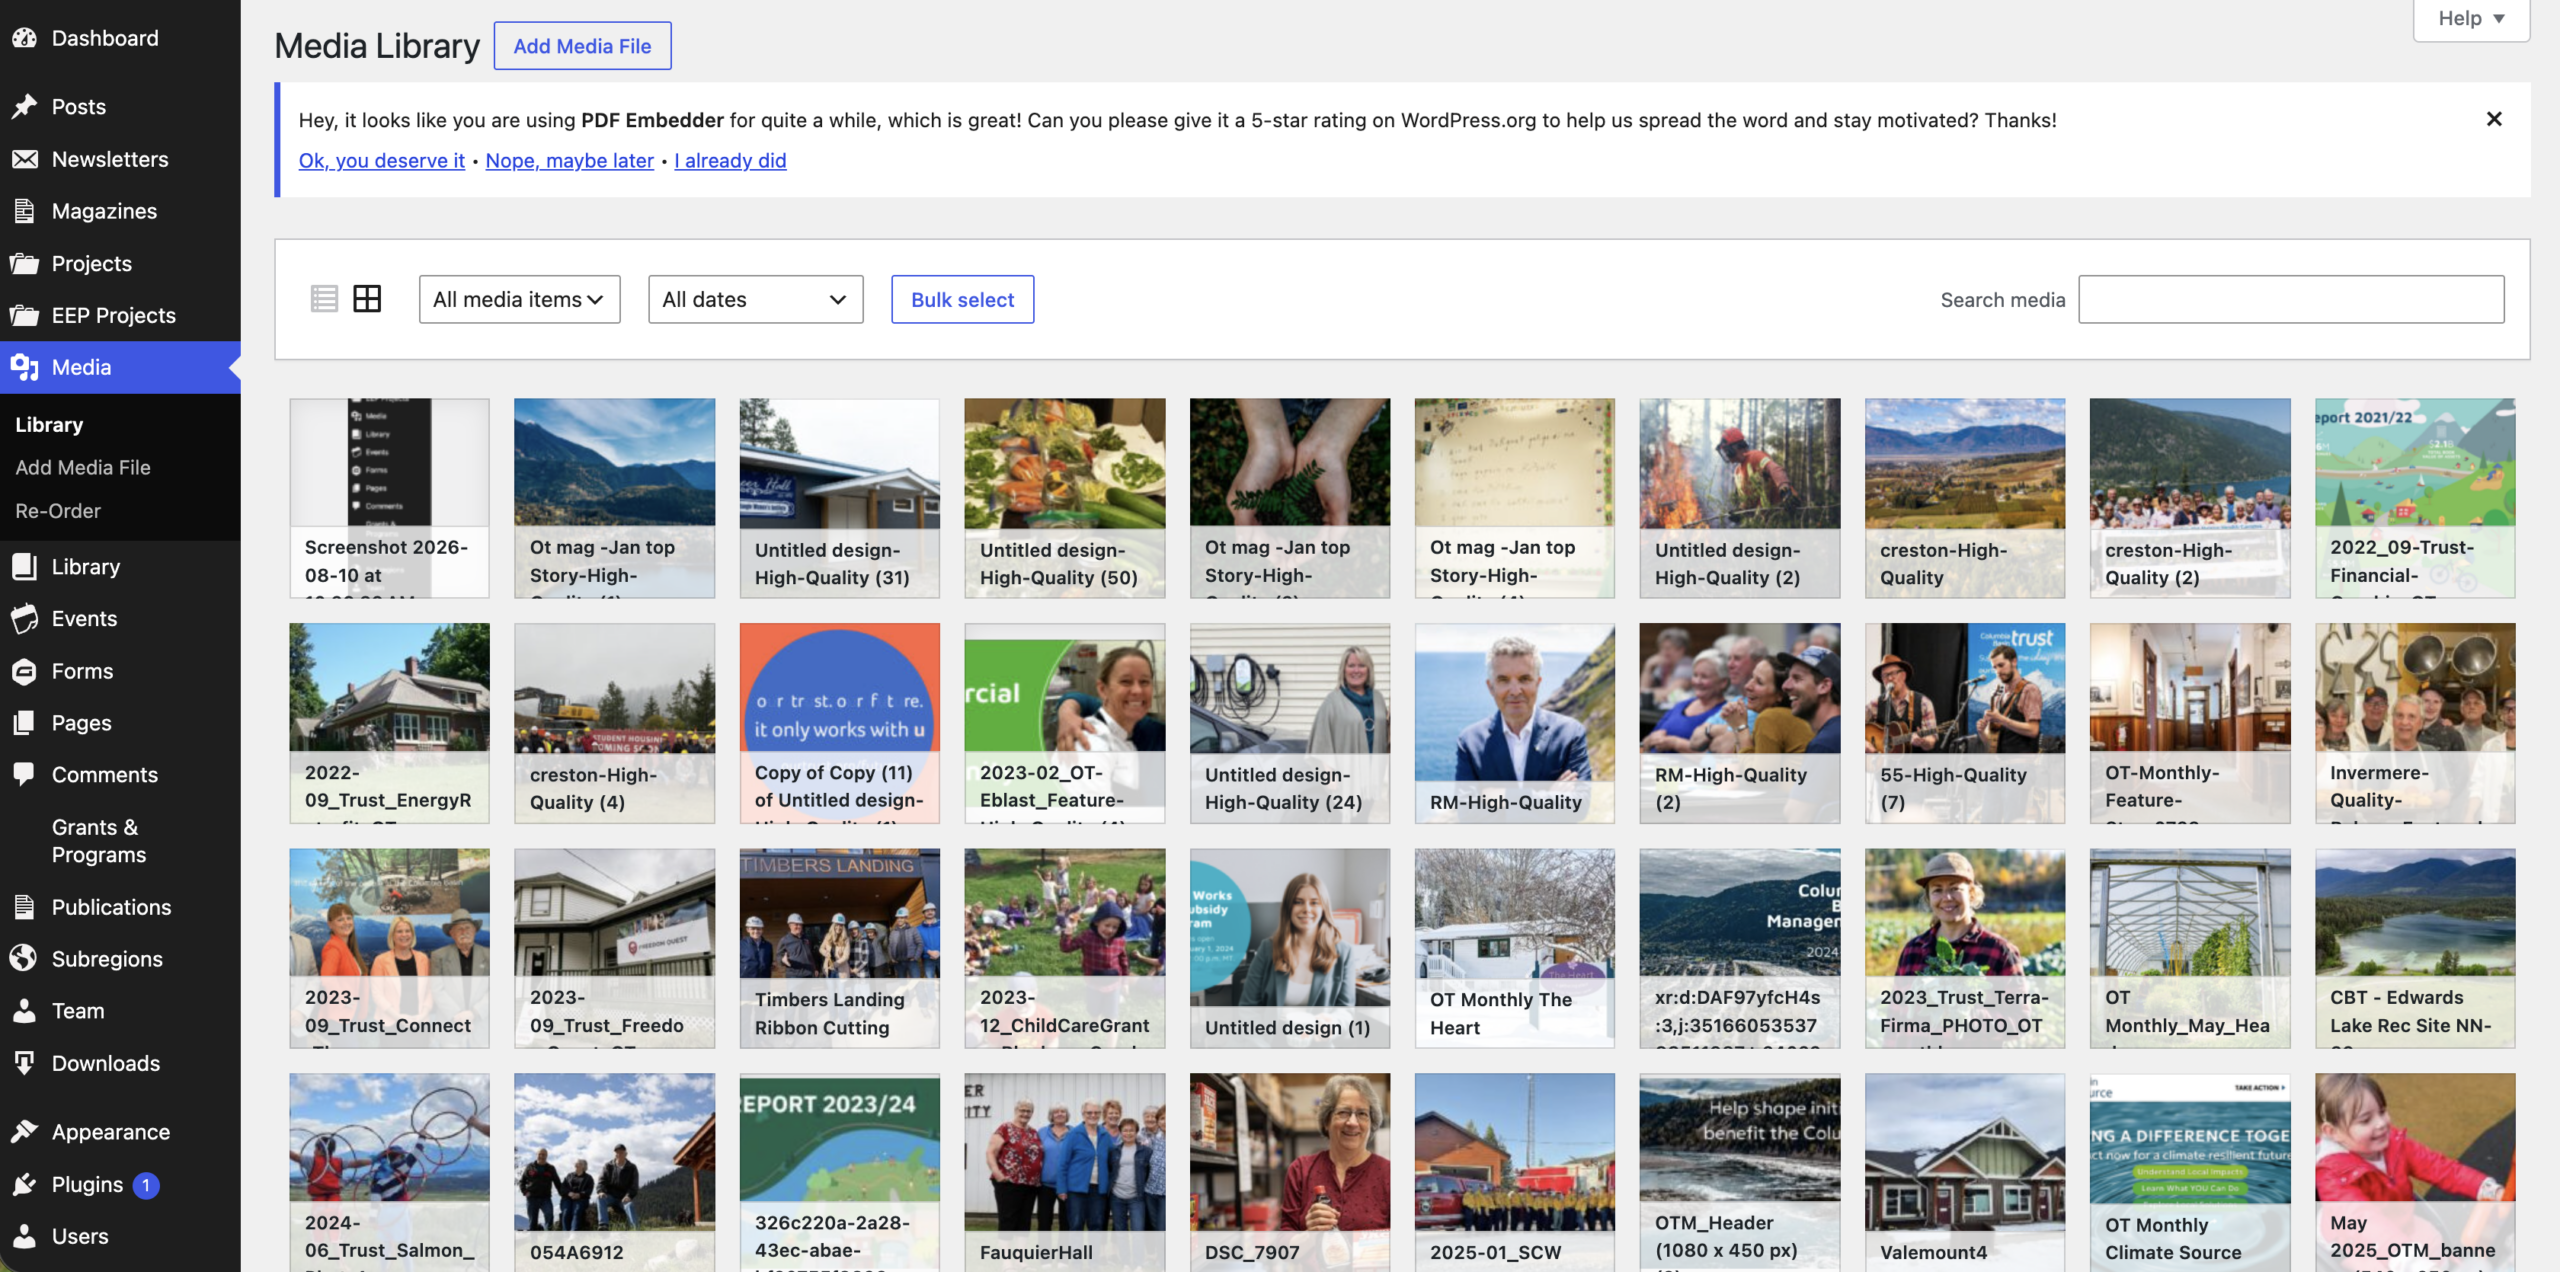
Media Overview
The Media Library contains all of the images, videos, logos and PDFs that are on your site. As there is quite a lot of media on your site, it has been divided into categories to make them more accessible.
Adding New Images & Videos
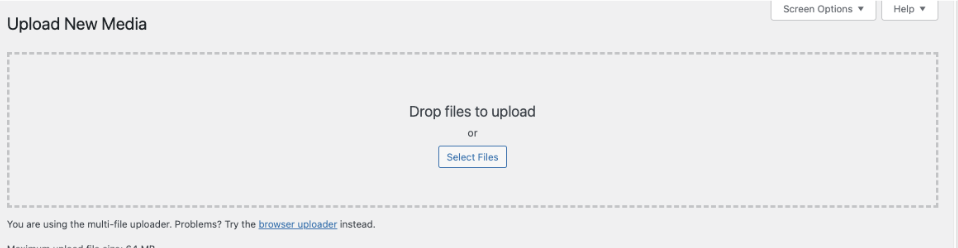
On the top of the Media Library, click on Add New. Then select the image or video that you want to upload.

The Upload option will open up and you can select or drag and drop images from your computer here.
Replacing Existing Images
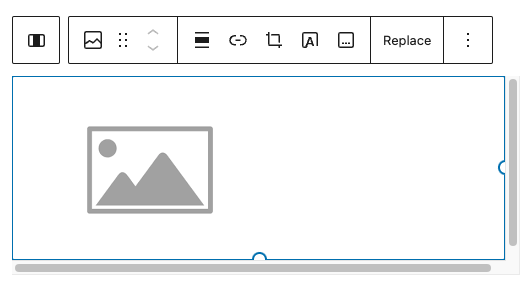
Hovering over the image will show the formatting options.
Clicking on the “x” will remove the image. The “Pencil” helps you to edit the existing image.
After removing the image, you can add a new one by clicking on “Add Image”
Add Image: Clicking here opens up the The Media Library.
The Media Library tab shows the images that are already on the website.
To add a new image you would click on the “Upload Files”
You can drag and drop or select files from your computer to upload.
Add Image: Clicking here opens up the The Media Library.
The Media Library tab shows the images that are already on the website.
To add a new image you would click on the “Upload Files”
You can drag and drop or select files from your computer to upload.
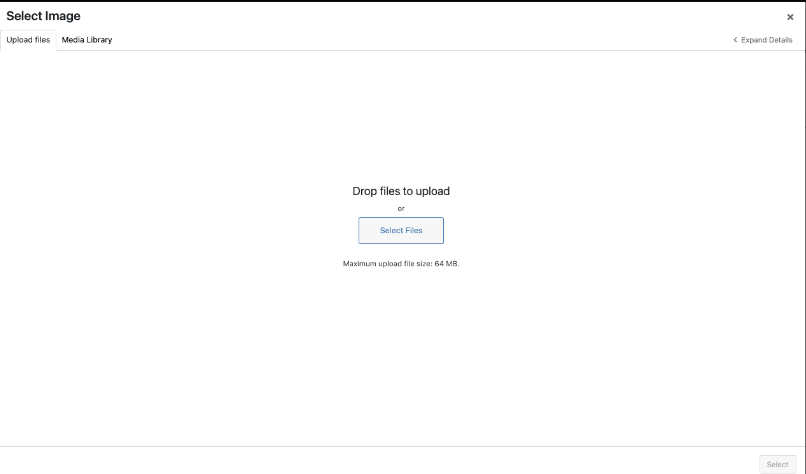
Image Sizes
Recommended Pixel Sizes
Feature image sizes (landscape 1200 x 900 pixels)
Feature image sizes (portrait 900 x 1200 pixels)
Background image size (1920 x 1080 pixels)
Logo image size (200 x 100 pixels)
Thumbnail image size (150 x 150 pixels)
Note: These are examples of standard pixel sizes and may not reflect the specific requirements of your site.
Image Formats
JPEG or PNG
Image File Size
Optimize every JPEG and PNG before uploading to improve website performance. Compressing images enhances speed without sacrificing quality. Use squoosh.app for effective compression without resizing images.
Editing Content
Most of the content on this site is in the form of paragraphs. In some cases, certain words have web links added to them. These links can take you to pages within the site or an external site.
Saving all edits:
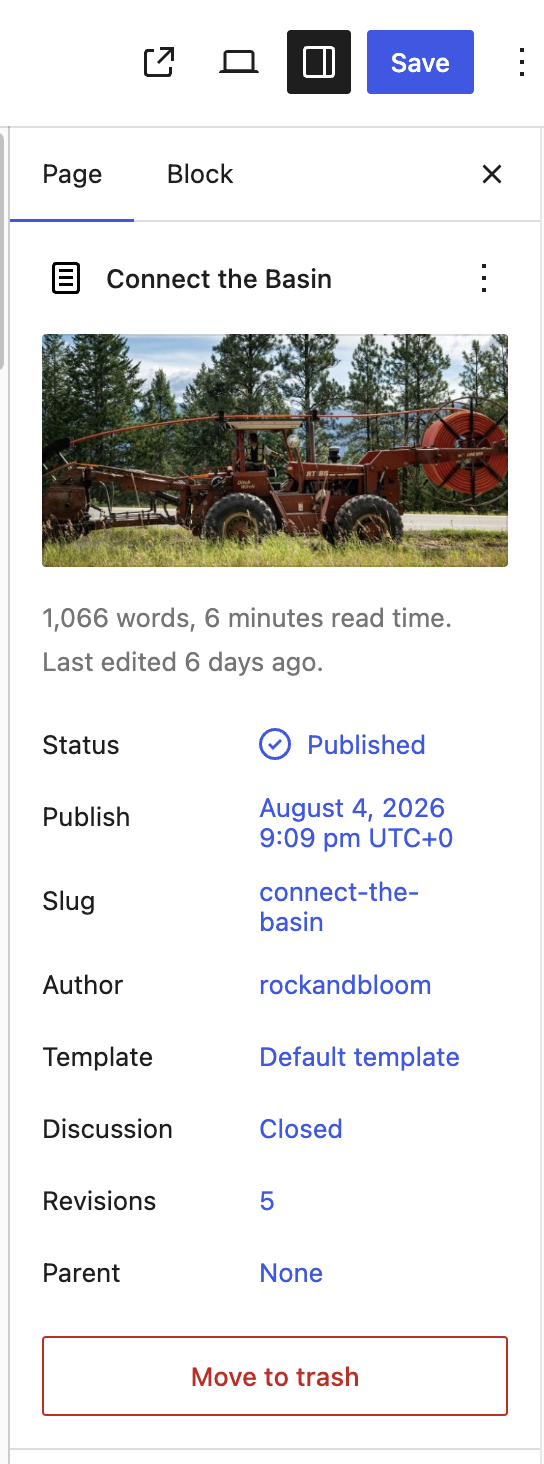
All page edits must be saved by clicking on the “Update” Button on the top right of the screen
Formatting Text
To make your content more engaging and easier to read, you can format your text in various ways:
- Bold: Highlight text and click the “B” button.
- Italic: Highlight text and click the “I” button.
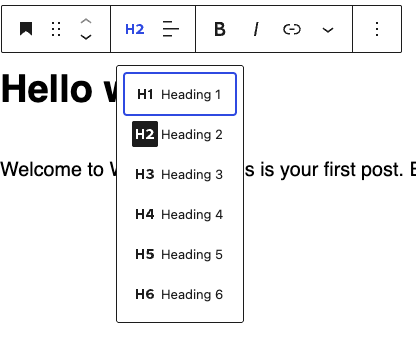
- Headings: Use headings to organize content. Select the text and choose the appropriate heading level from the drop-down menu in the editor.
- Lists: Create bullet points or numbered lists by clicking the respective buttons.
You can also add links to your content that would link to another page on your site (and internal link) or link to a different website (an “external link”)
To add a link to a certain word or phrase:
- highlight the word or phrase you would like to add a link to.
- Click on the “chain link” icon.
- Paste in or search for the link that you would like to add.
- Click on the link and press Enter.
- To add an external link, follow the same steps as above, except after adding the link, make sure the “Open in new tab” option is selected.

Schedule Post
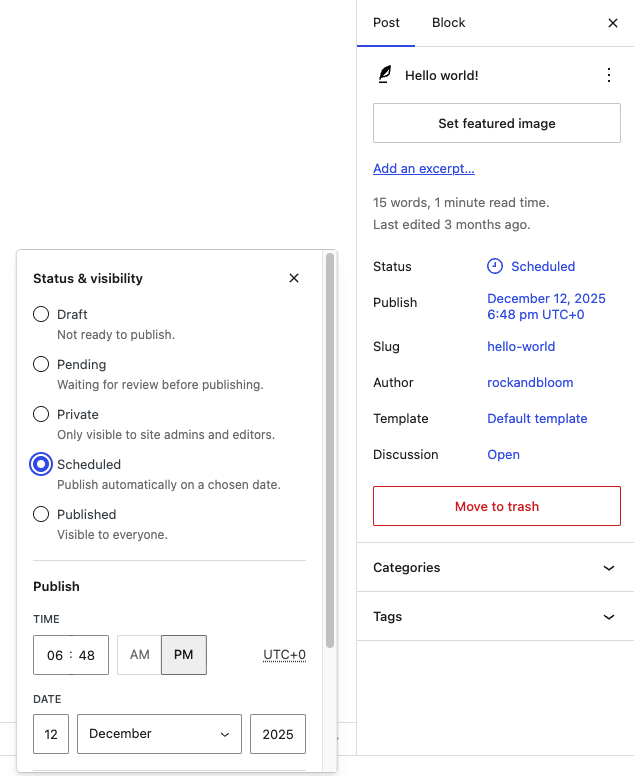
To schedule a post:
- Go to the Publish section on the right sidebar.
- Click the current publish value. The image, the value is Immediately.
- Set the date and time the post should be published on.
- Select the Schedule button that appeared on the top bar.

Redirects
To add a redirect to a page (which is often used for social media purposes) go the Tools > Redirection:
- Add the Source URL
- The new url (URL you wish to redirect from)
- Do NOT include https://ourtrust.org/, you only need / in front of the new url
- Ignore Query Parameters
- Stay as default “Exact match in any order”
- Add the Target URL
- The old URL (URL you wish to redirect to)
- Do NOT include https://ourtrust.org/, you only need / in front of the old url
- Ignore Group
- Stay as default “Redirections”
- Click Save
Redirects already created can be edited or deleted by hover over the redirect name and selecting the required action.

Meta Data
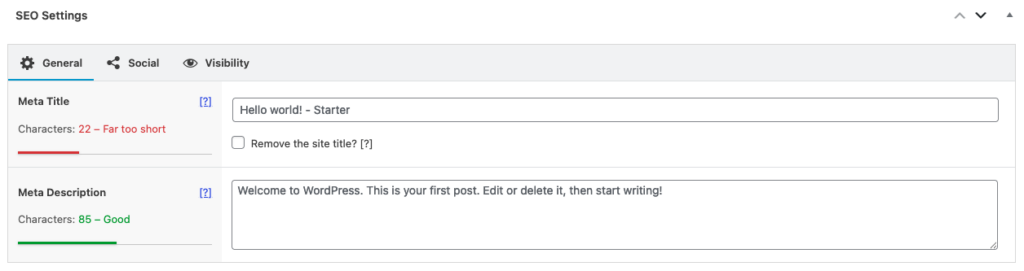
Each Page and Post has a SEO Settings section created by the plugin SEO Framework.
- Meta Title
- Recommended length 50-60 characters
- Meta Descriptions
- Recommended length 155-160 characters
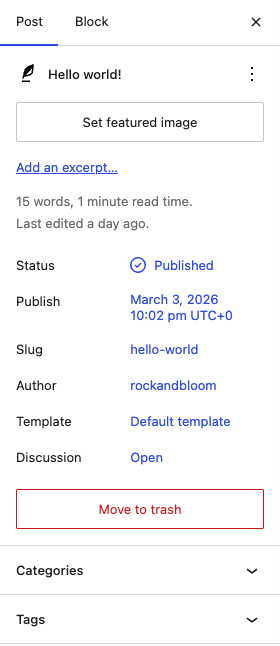
Each Page and Post has a slug which can be updated and shortened.
- Recommend 50-60 characters at most like a Meta Title
- Navigate to the right hand side bar
- Click on the slug
- Update slug
- Click “Save”
- Likewise, you can add a redirection instead that is a shorter URL version for social links
Headings
For Pages and Posts:
- Include only one H1 per page/post
- Do not use bolded text or font size changes to create fake headings
- Headings should accurately describe the content below them, helping users scan the page
- Do not make large blocks of text into headings
Alt Text
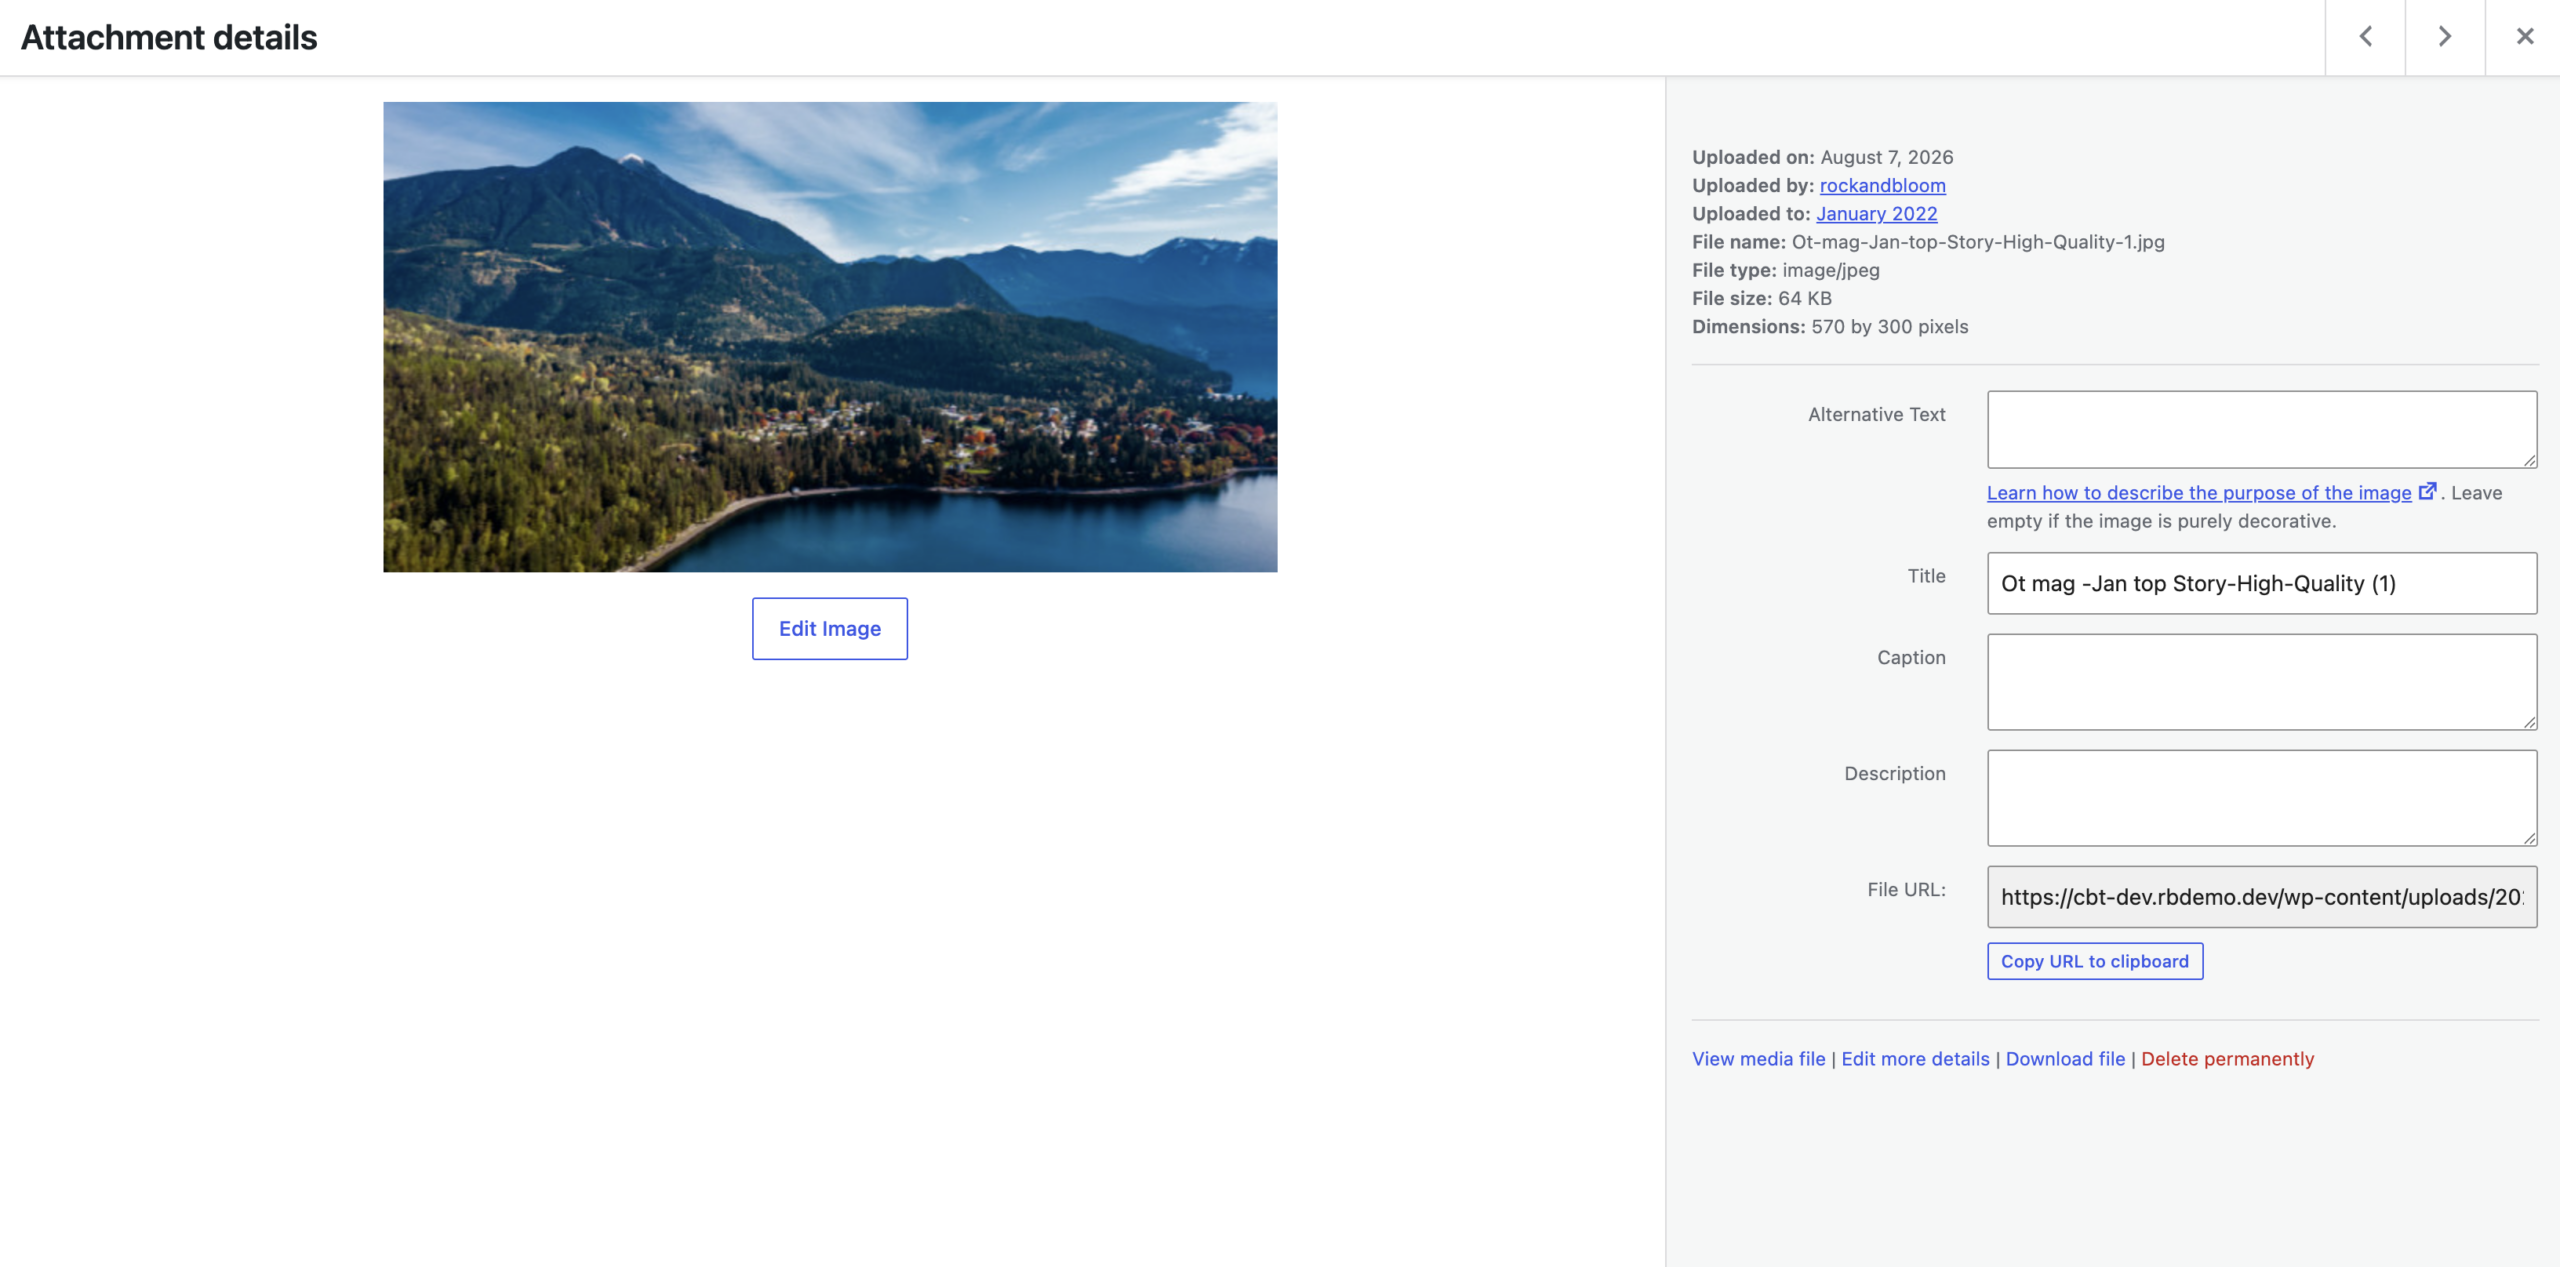
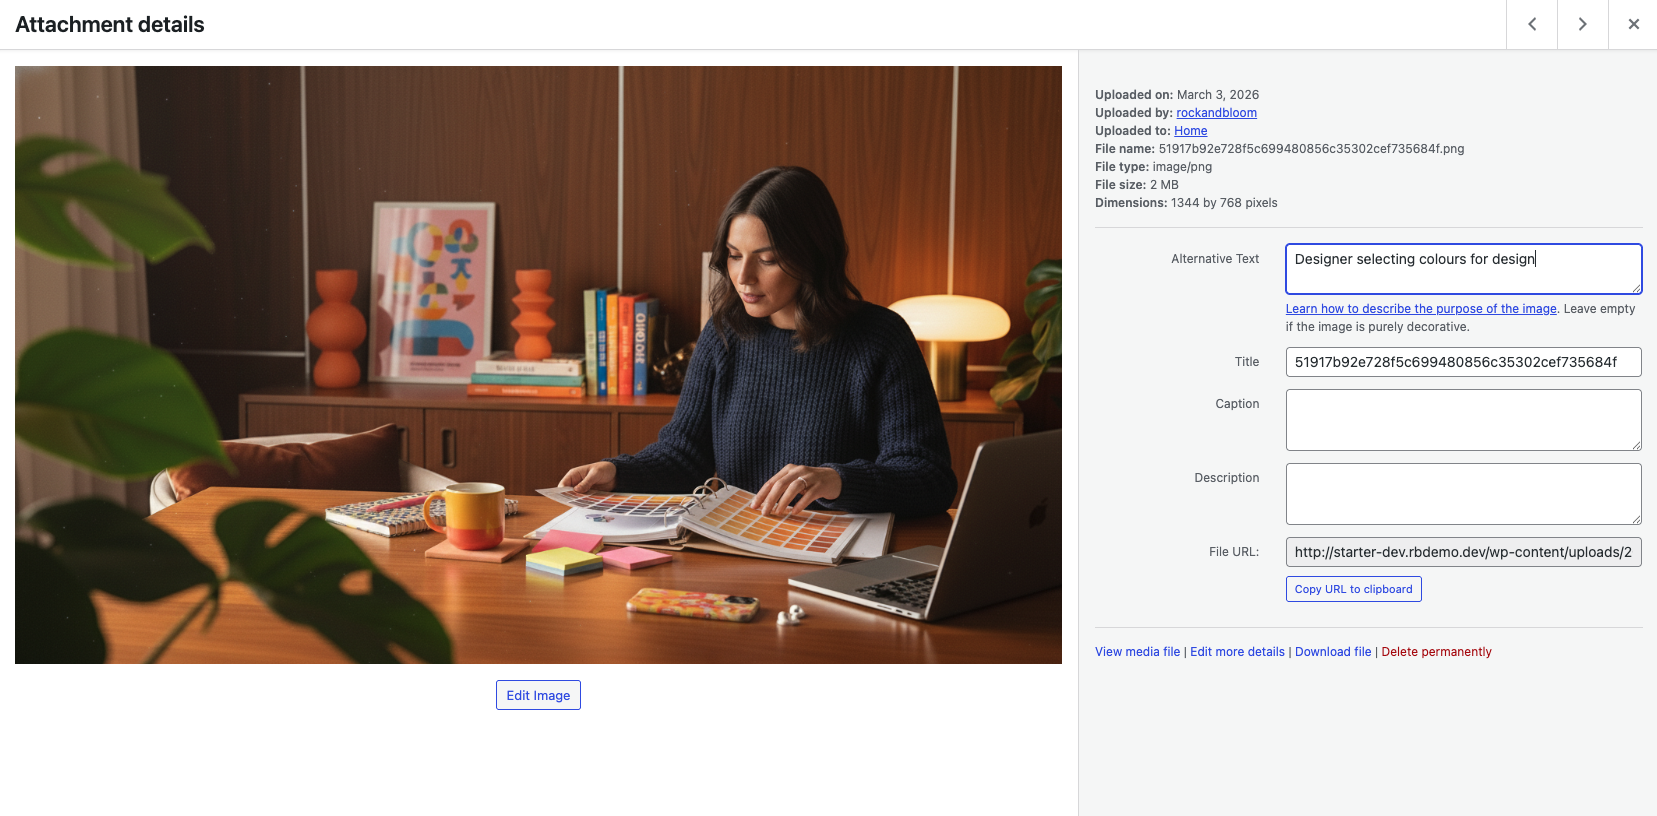
For media it’s recommended to include alt text, titles, captions, and descriptions for visitors using screen readers.
Alt text, titles, captions, and descriptions can be added in the Media Library.
- Select media file
- Add alt text, title, caption, and/or description
- Will be attached to media where ever used unless modified elsewhere
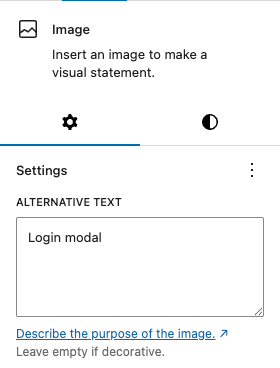
Alt text can also be added to an image on a specific page or post.
- Navigate to desired page/post
- Select media block to update
- Add alt text
- Will only be connected to that media file on that page/post. Does not affect same media file when used on other pages/posts.
Navs
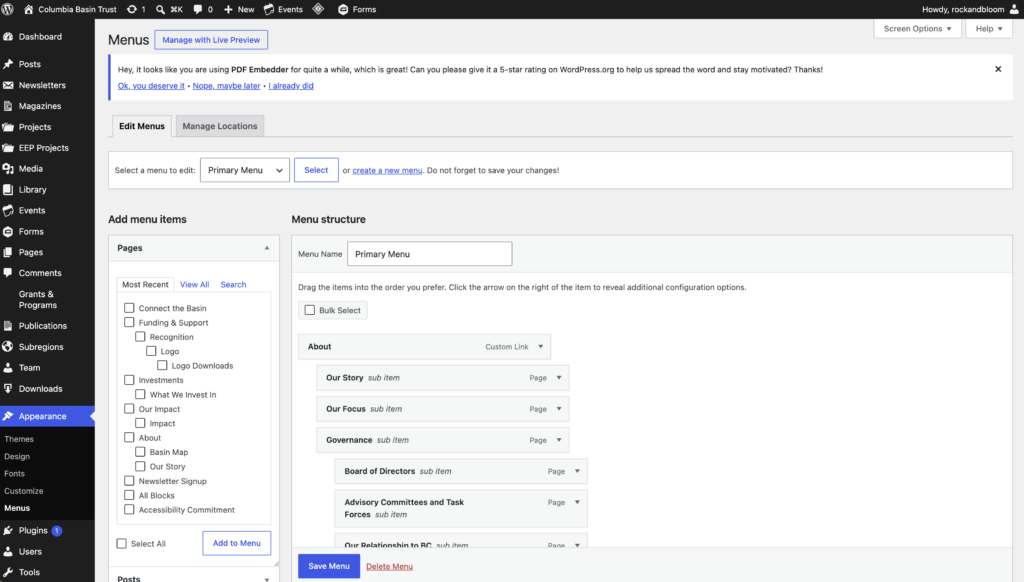
Go to Appearance > Menus. Update:
- Primary Menu
- Secondary Menu
- Footer Menu
- Privacy Menu
You can add pages, custom links, reorder menu item items, etc. Just remember to click “Save Menu” when you’re done and ready for the changes to go live.
To reorder Side Navigations, go to Pages and reorder pages with drag and drop option on the lefthand side (beside the page title). Side Navigations are auto populated by page hierarchies and page order.
Company Details
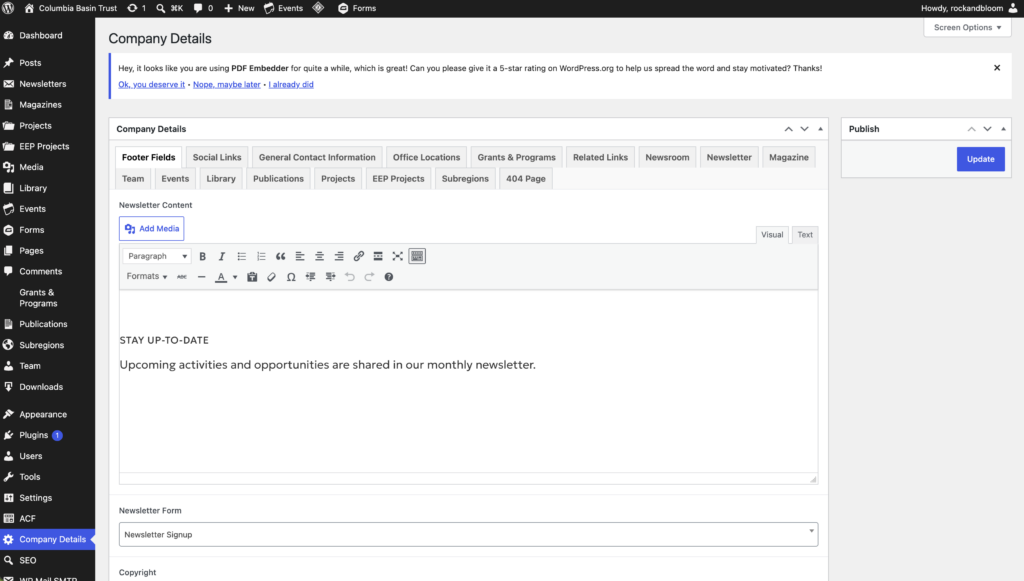
Go to Company Details. Includes:
- Footer Fields
- Social Links
- General Contact Information
- Office Locations
- Related Links
- 404 Page
Page
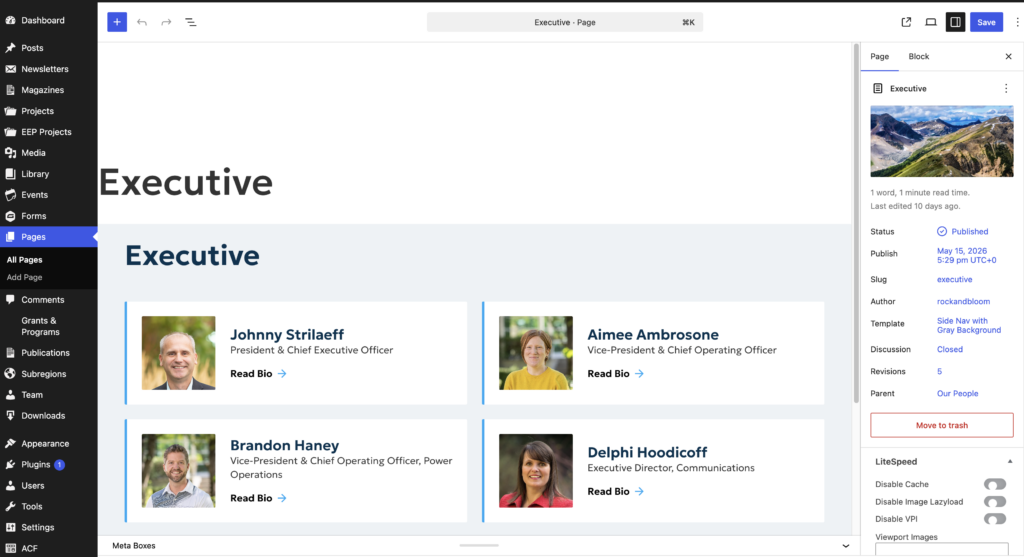
Includes:
- Featured Image (Banner Image)
- Parent
- Determines Side Nav Heirarchy
- Template
- Only use Side Nav with Gray Background for Team pages (e.g. Executive)
- Otherwise keep blank
- Display Latest Events
- Displays Latest Events at bottom of page
- Contact Card
- Displays Contact Card at bottom of page if fields are filled out
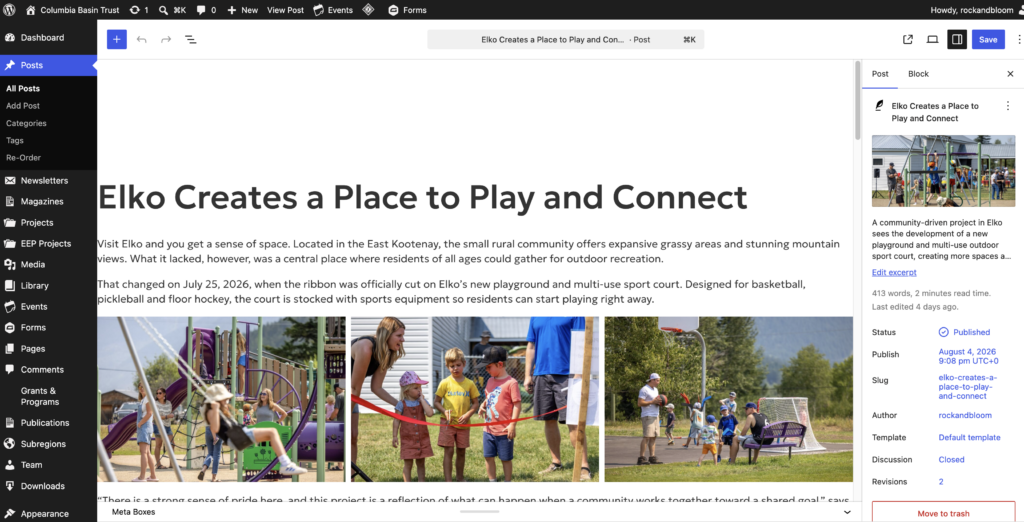
Posts
Similar to Pages, it includes a title, featured image, blocks, and text.
To create a new post, select Add New Post.
Additional steps include:
- Categories
- News, Basin Stories
- Select the Primary Category – dependent on the categories already selected
- Excerpt: (optional) will display the beginning content on News & Stories if left blank
- Featured Image
Posts are automatically added to News & Stories when the posts are published.
Newsletters
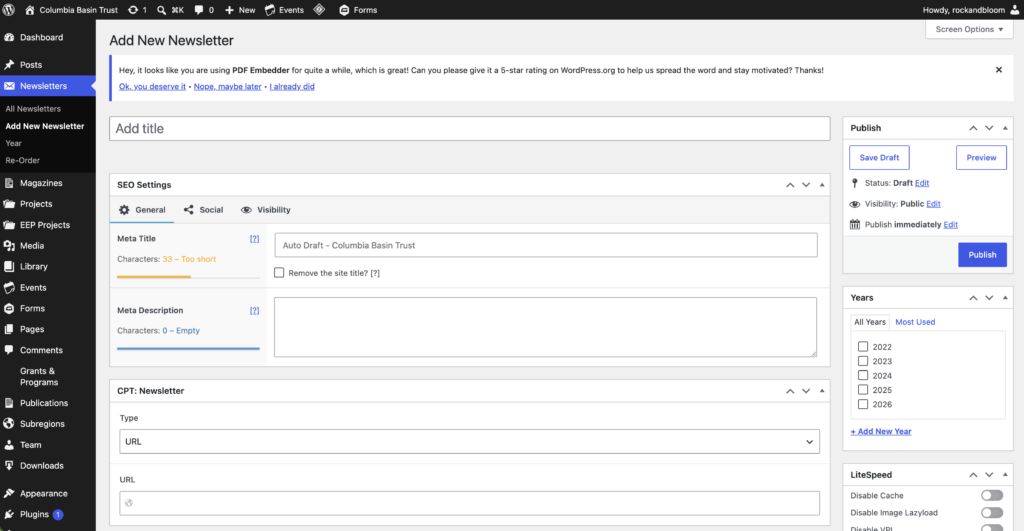
To update Newsletters Page content go to Company Details > Newsletter. Includes:
- Newsletter Content
- Newsletter Banner Image
To create a new post, select Add New Newsletter.
Posts include:
- Title
- Type: URL or File
- Years Category
- Featured Image
Posts are automatically added to Newsletters Archive when the posts are published.
Magazines
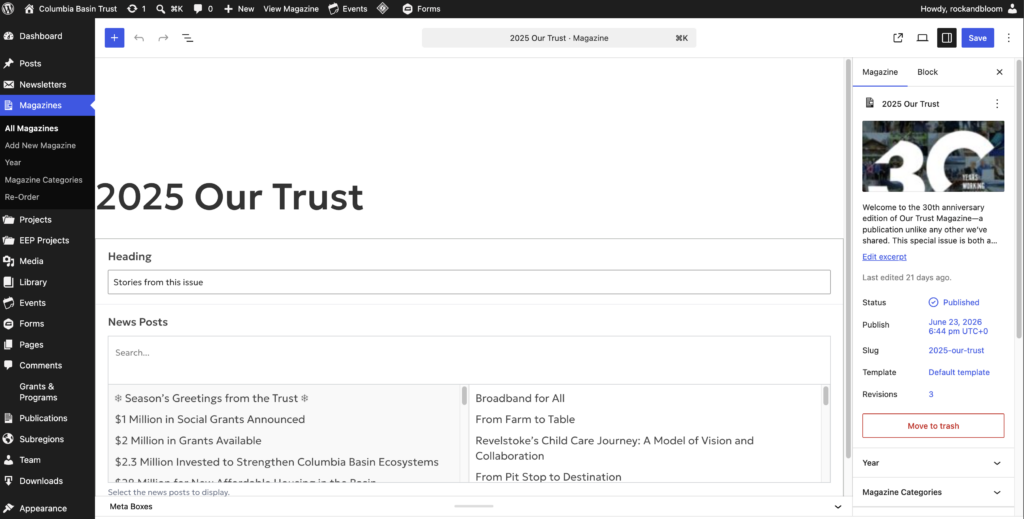
To update Magazine Page content go to Company Details > Magazine. Includes:
- Magazine Content
- Magazine Banner Image
To create a new post, select Add New Magazine.
Posts include:
- Title
- Content
- Featured Image
- File
- Year Category
- Magazine Category
Posts are automatically added to Magazine Archive when the posts are published.
Projects
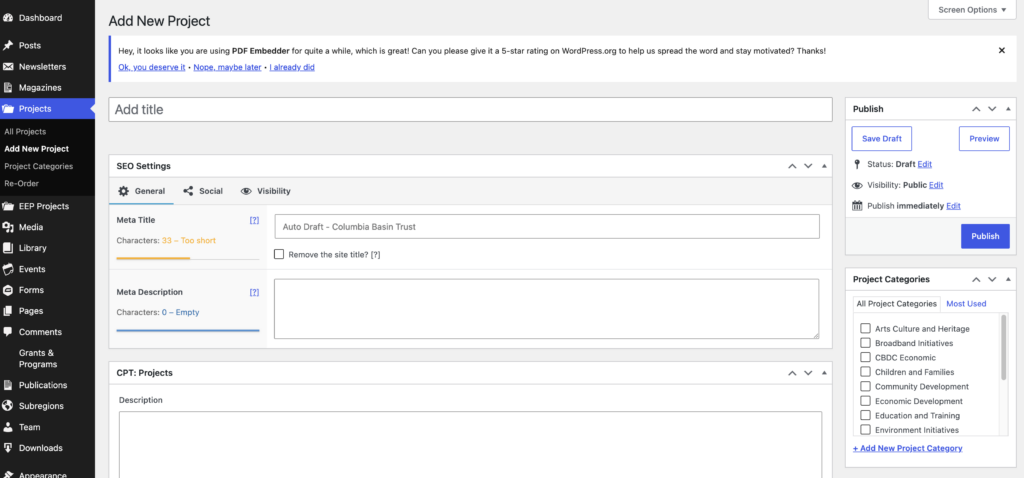
To update Projects Page content go to Company Details > Projects. Includes:
- Project Banner Content
- Project Banner Image
To create a new post, select Add New Project.
Posts include:
- Title
- Description
- Organization
- Program Name
- Committed Amount
- Location Category
- Year Category
- Project Category
Posts are automatically added to Projects when the posts are published.
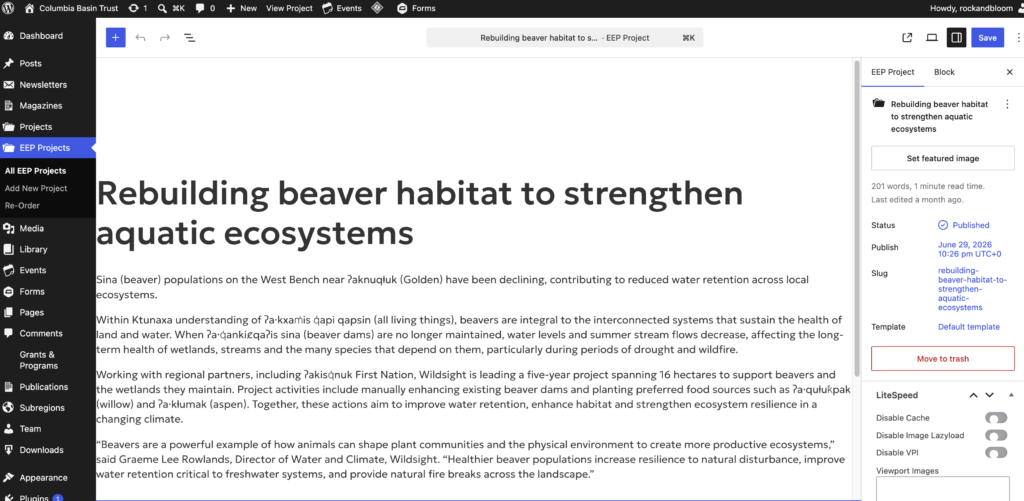
EEP Projects
To update EEP Projects Page content go to Company Details > EEP Projects. Includes:
- EEP Projects Banner Content
- EEP Projects Banner Image
To create a new post, select Add New EEP Project.
Posts include:
- Title
- Content
- Recipient
- Subregion
- Featured Image
Posts are displayed to Grants & Programs posts where Display EEP Projects is selected and post is added to Subregions post.
Library
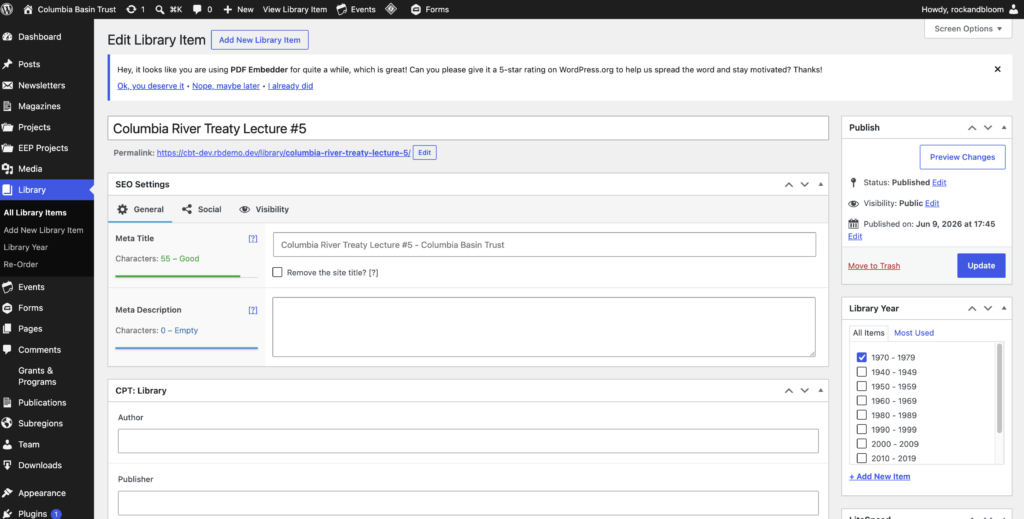
To update Library Page content go to Company Details > Library. Includes:
- Library Banner Content
- Library Banner Image
To create a new post, select Add New Library Item.
Posts include:
- Title
- Author
- Publisher
- Date
- Description
- Media
- URLs
- Library Year Category
Posts are automatically added to Library when the posts are published.
Events
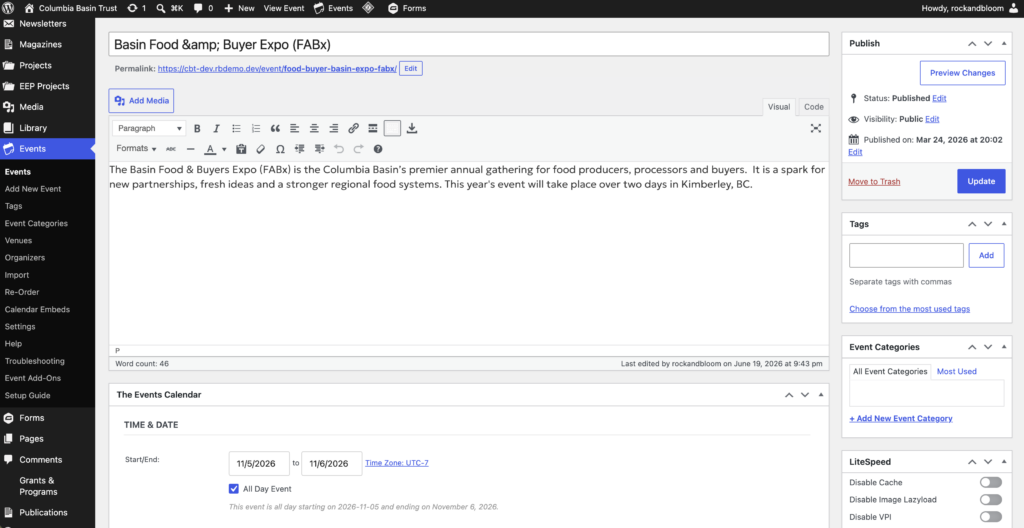
To update Events Page content go to Company Details > Events. Includes:
- Events Banner Content
- Events Banner Image
To create a new event, select Add New Event.
Events include:
- Title
- Content
- Time & Date
- Location
Posts are automatically added to Events when the posts are published.
Grants & Programs
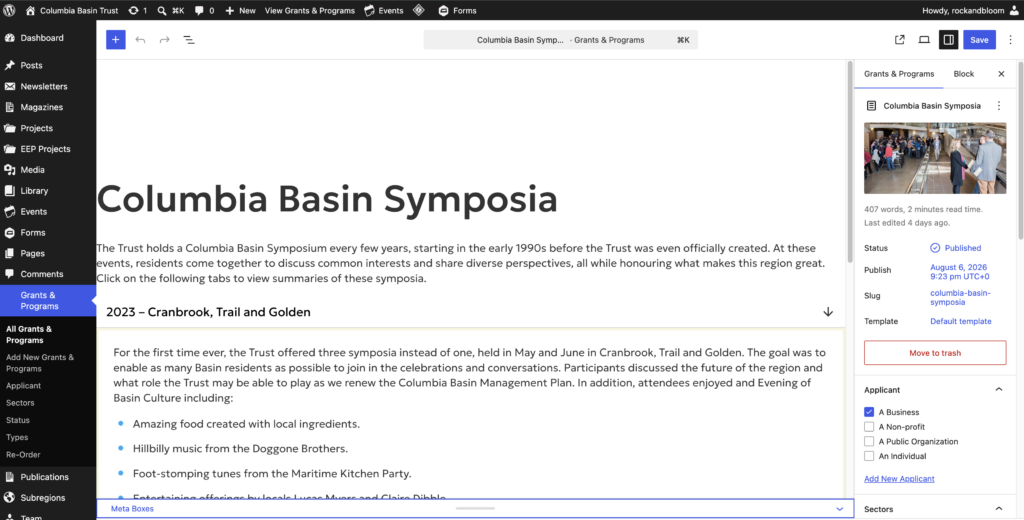
To update Newsletters Page content go to Company Details > Grants & Programs. Includes:
- Grants & Programs Content
- Grants & Programs Banner Image
- Directory CTA
- Directory File
- Grants & Programs CTA
To create a new post, select Add New Grants & Programs.
Posts include:
- Title
- Content
- Info
- Description
- Featured Program
- Contact
- Contact Image
- Contact Name
- Contact Position
- Contact Email
- Contact Phone
- Contact Location
- Contact Content
- EEP Projects
- Display EEP Projects
- Data Sources Heading
- Date Sources Content
- Data Sources Link
- Applicant Category
- Sectors Category
- Status Category
- Types Category
Posts are automatically added to Grants & Programs when the posts are published.
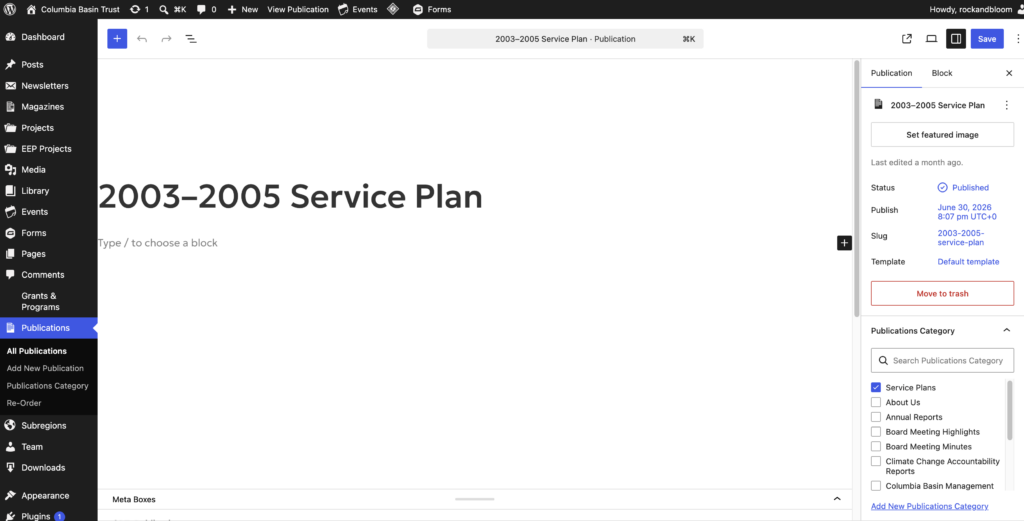
Publications
To update Newsletters Page content go to Company Details > Publications. Includes:
- Publication Banner Content
- Publication Banner Image
To create a new post, select Add New Publication.
Posts include:
- Title
- Content
- URL
- File
- Publications Category
- Featured Image
Posts are automatically added to Publications when the posts are published.
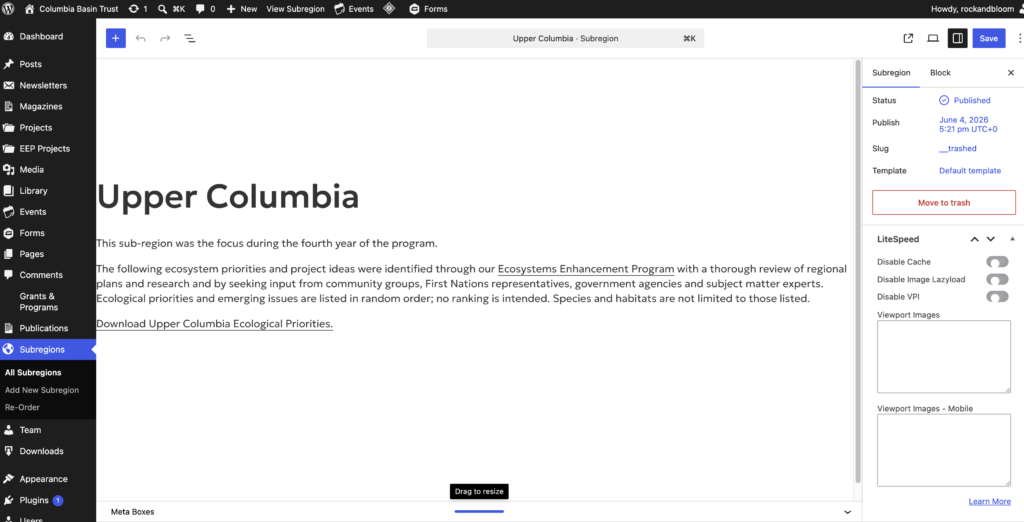
Subregions
To update Newsletters Page content go to Company Details > Subregions. Includes:
- Regional Map Heading
- Regional Map Content
- Regional Map Subcontent
To create a new post, select Add New Subregion.
Posts include:
- Title
- Content
- Color
- EEP Projects
- Featured Image
Posts are displayed to Grants & Programs posts where Display EEP Projects is selected.
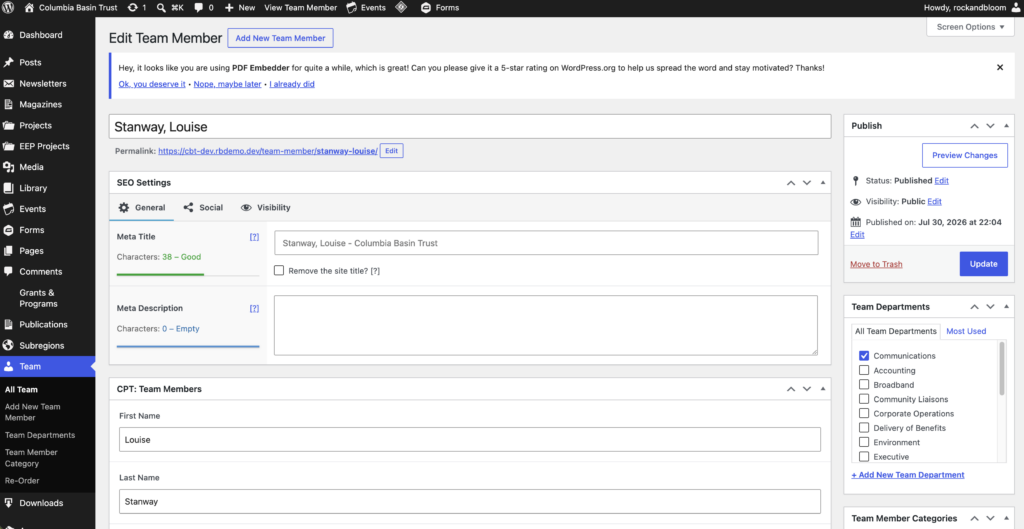
Team
To update Staff Page content go to Company Details > Team. Includes:
- Team Banner Image
To create a new team member, select Add New Team Member.
Posts include:
- Title (Last Name, First Name)
- First Name
- Last Name
- Position
- Biography
- Phone
- Location
- Department
- Headshot
- Team Department Category
- Team Member Category
- If Staff, automatically added to Staff Directory page
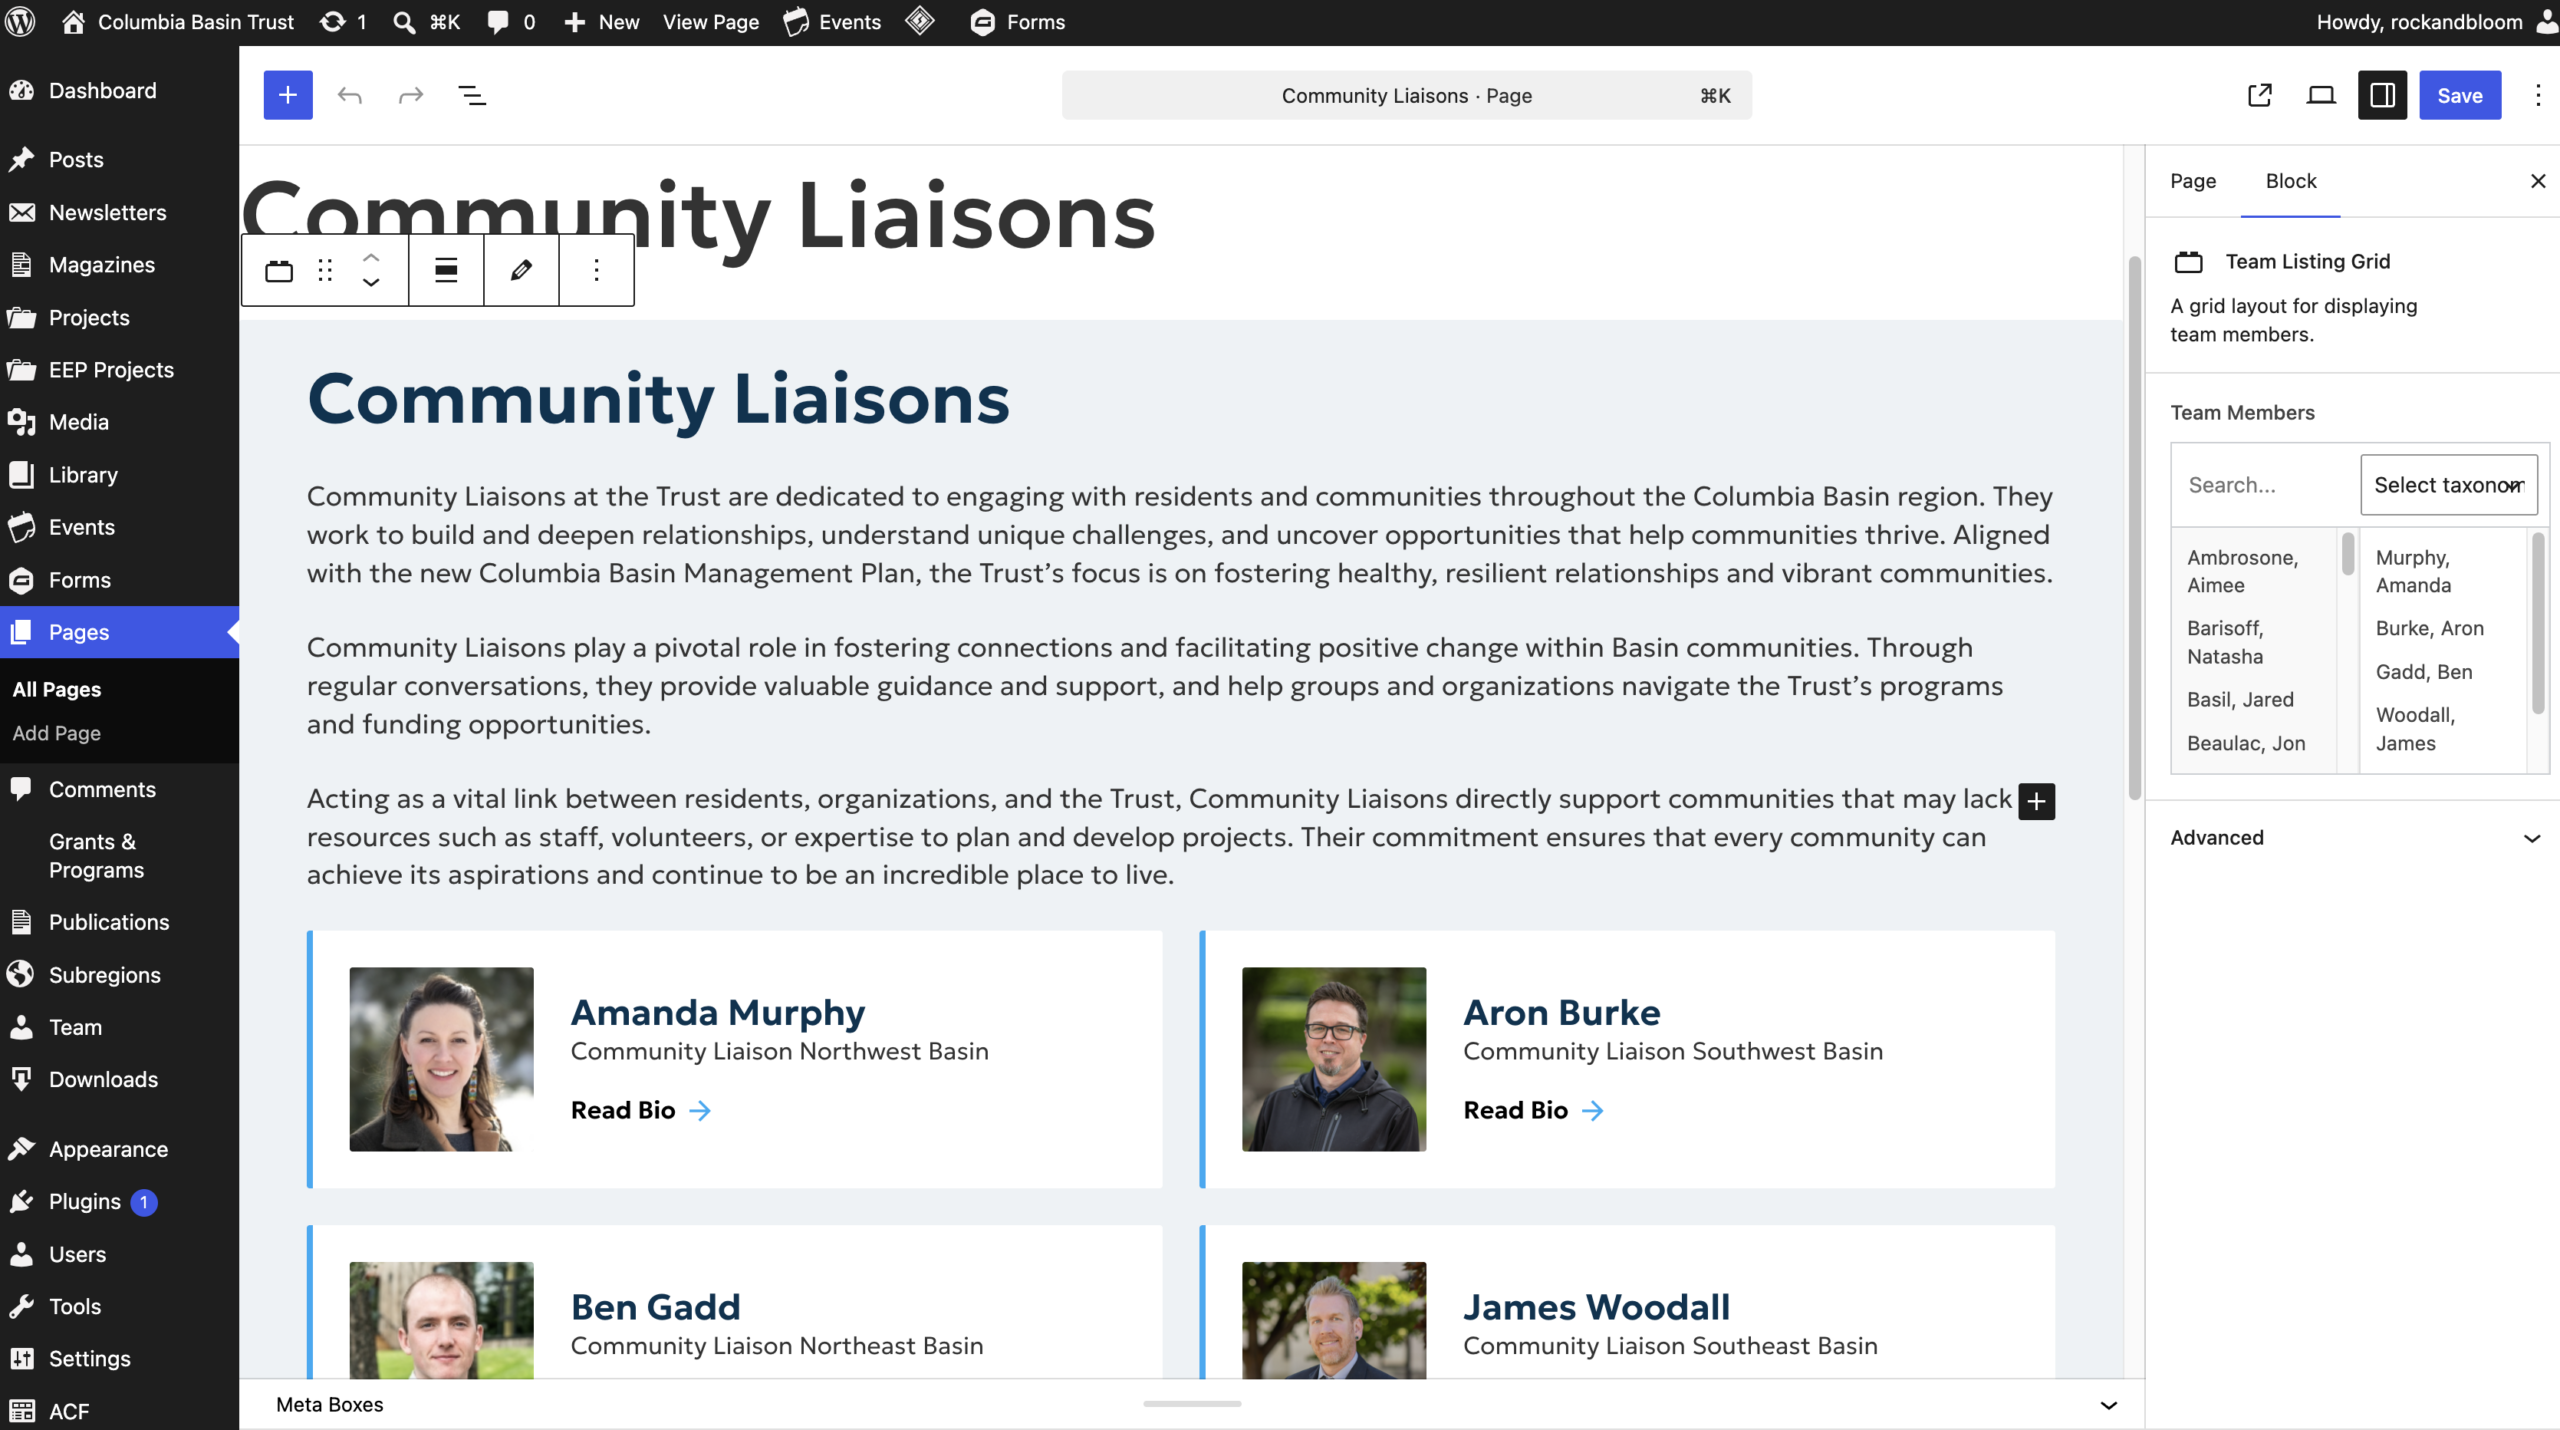
To add team members to other Team pages, go to Pages > [Team Member Category] and update the Team Listing Grid block.
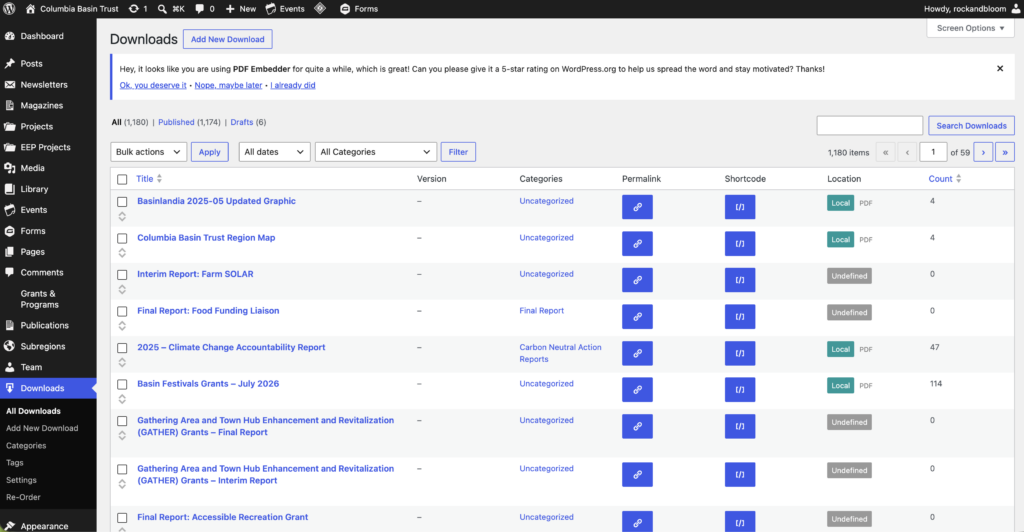
Downloads
To create a new Download, select Add New Download. Includes:
- Download URL or File
- Category
To get the URL of download:
- Search Downloads
- Click Permalink Button
Group
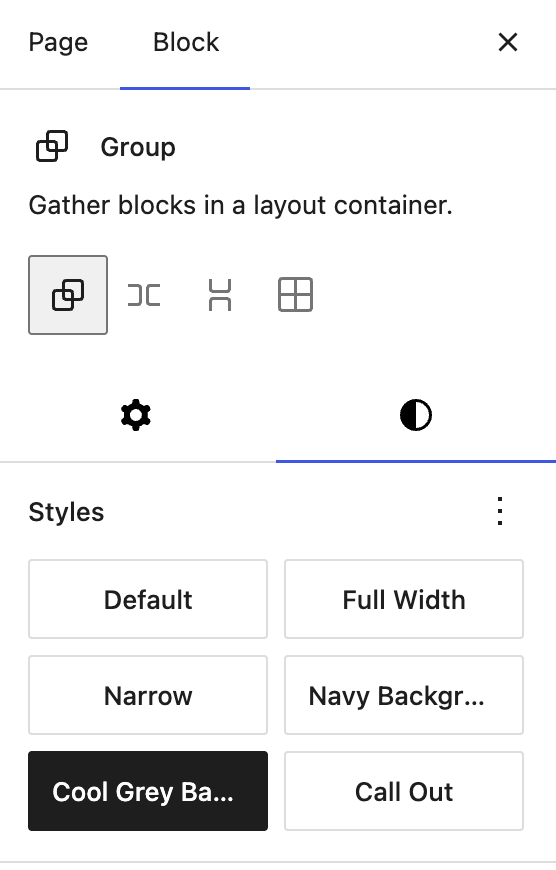
Group sections together with the group block. It adds padding to the top and bottom of the section and centres the content on the page.
The options follow:
- Default (no padding)
- Full Width (padding top & bottom)
- Narrow
- Navy Background
- Cool Grey Background
- Call Out (blue line on left)
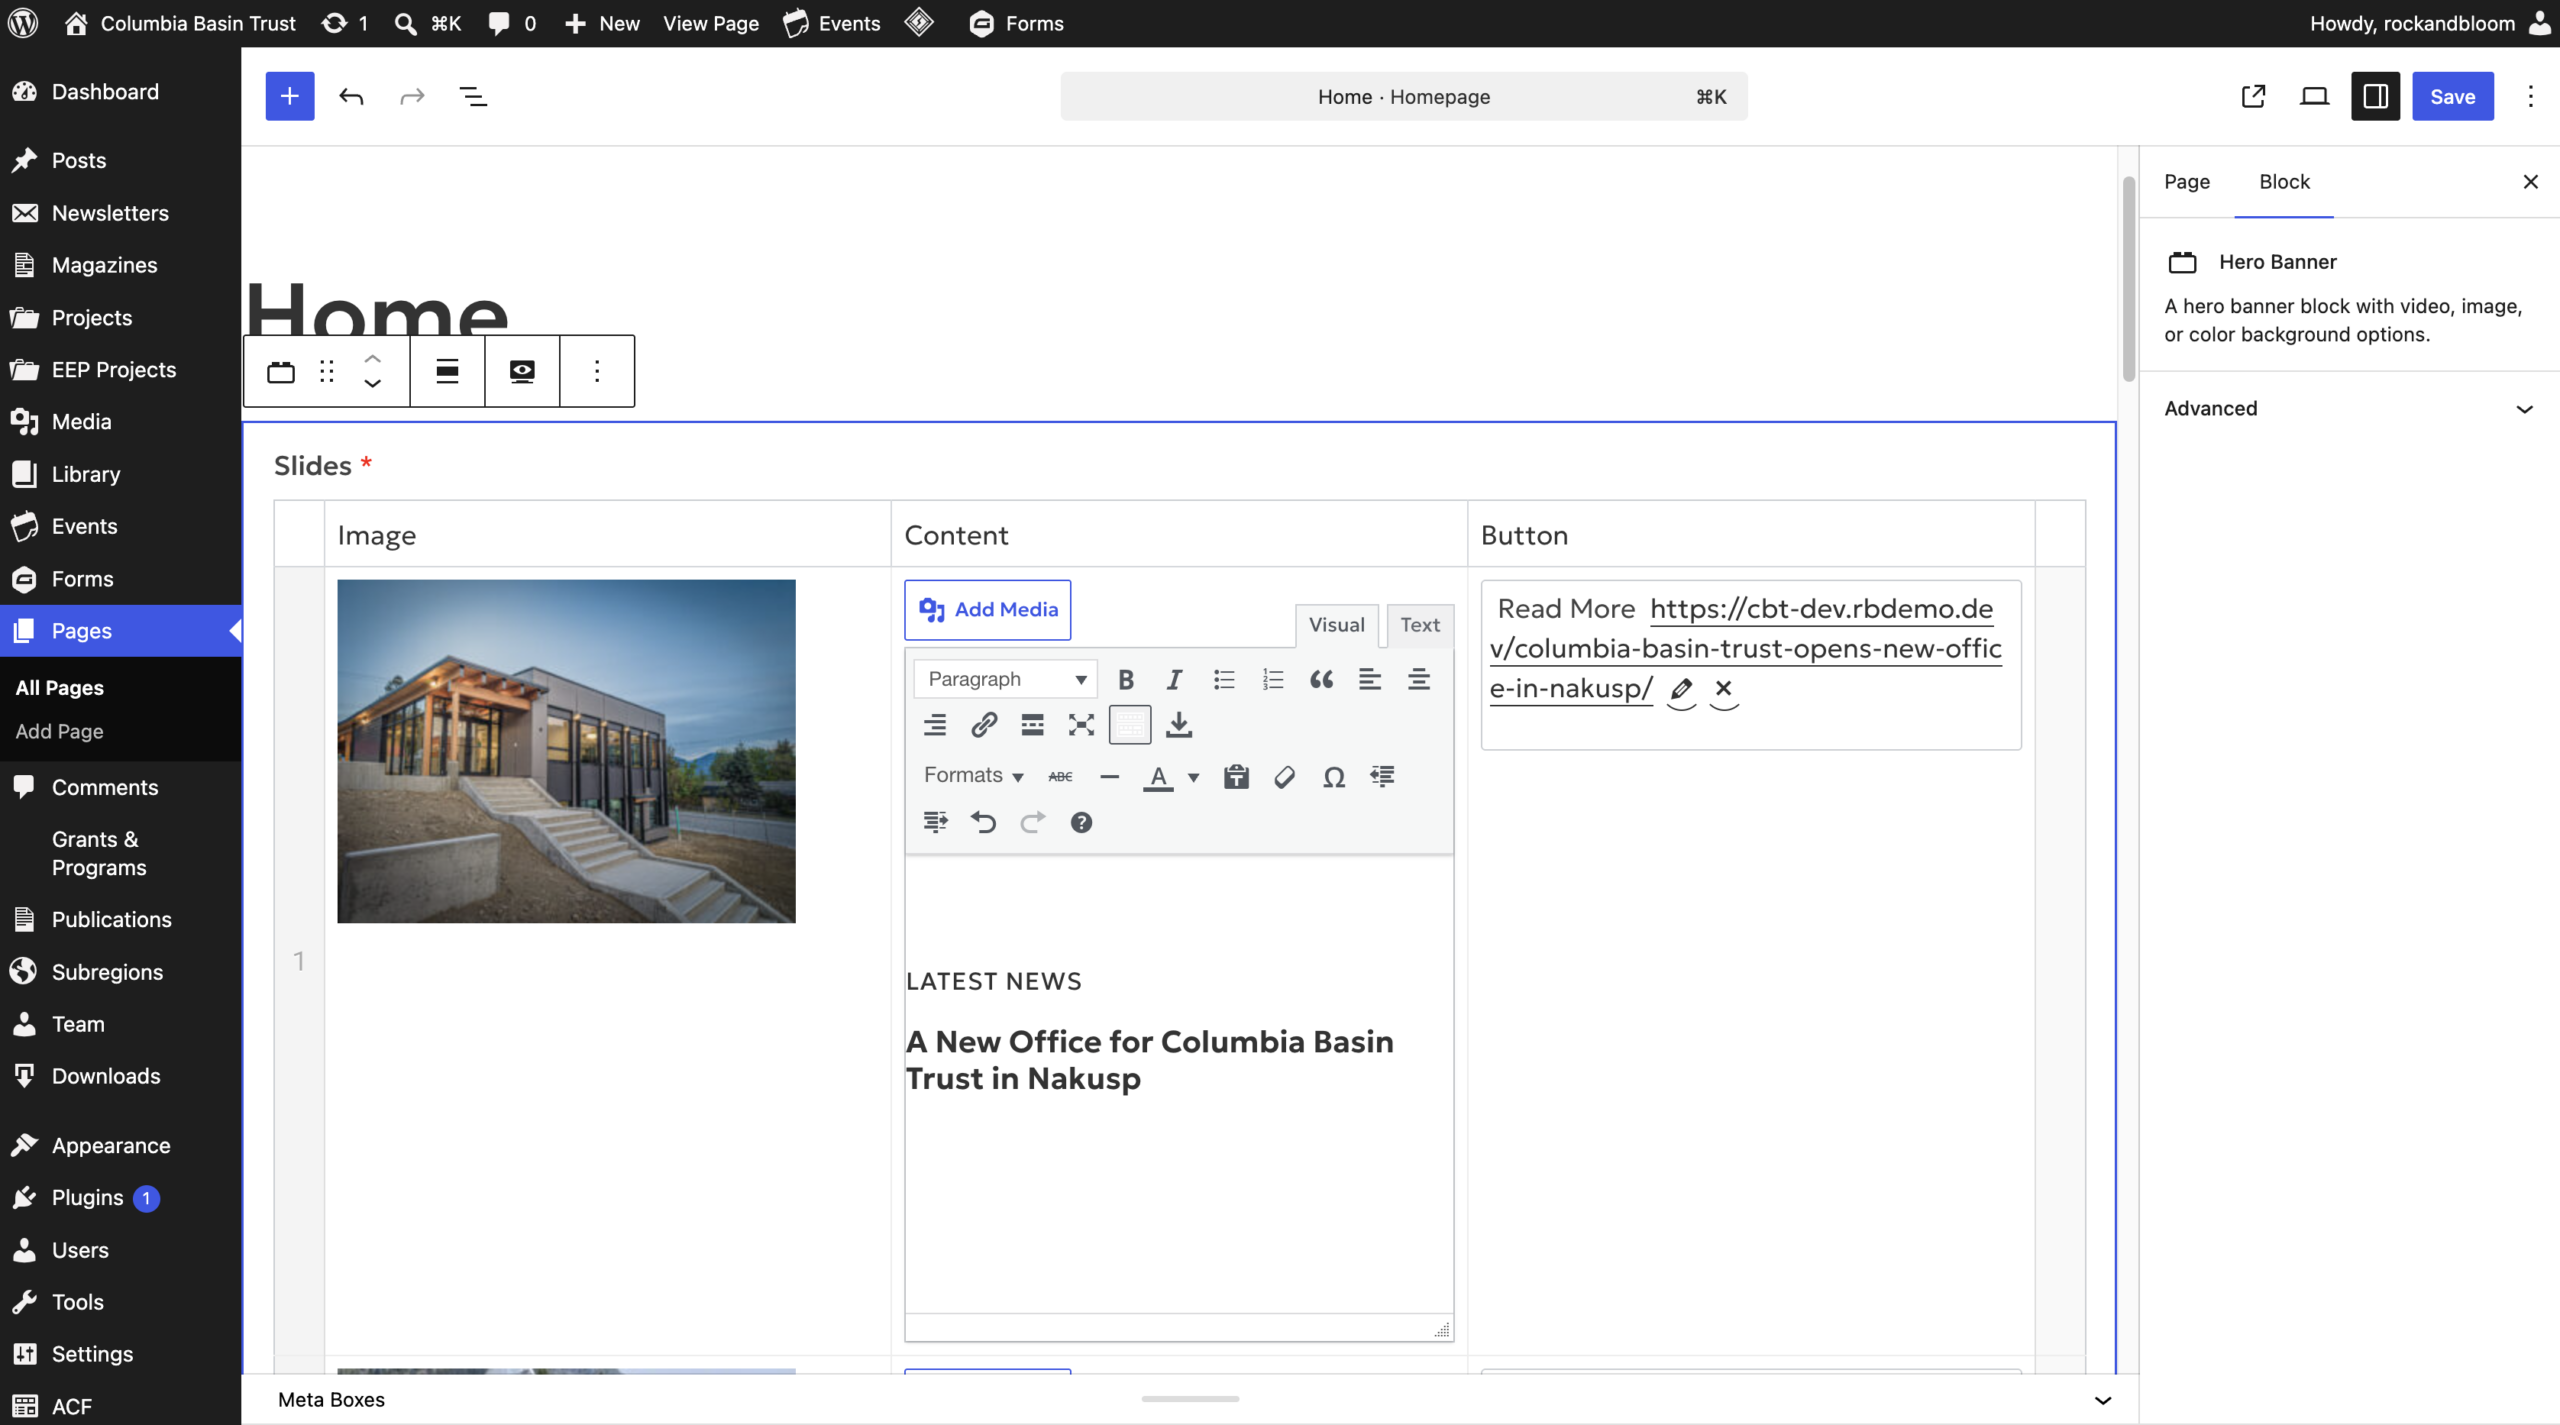
Hero Banner
This block requires:
- Image
- Content
- Button
Add more slides by clicking the “Add Row” button or “+” beside the row.
Remove a slide row by clicking “-“ beside the row
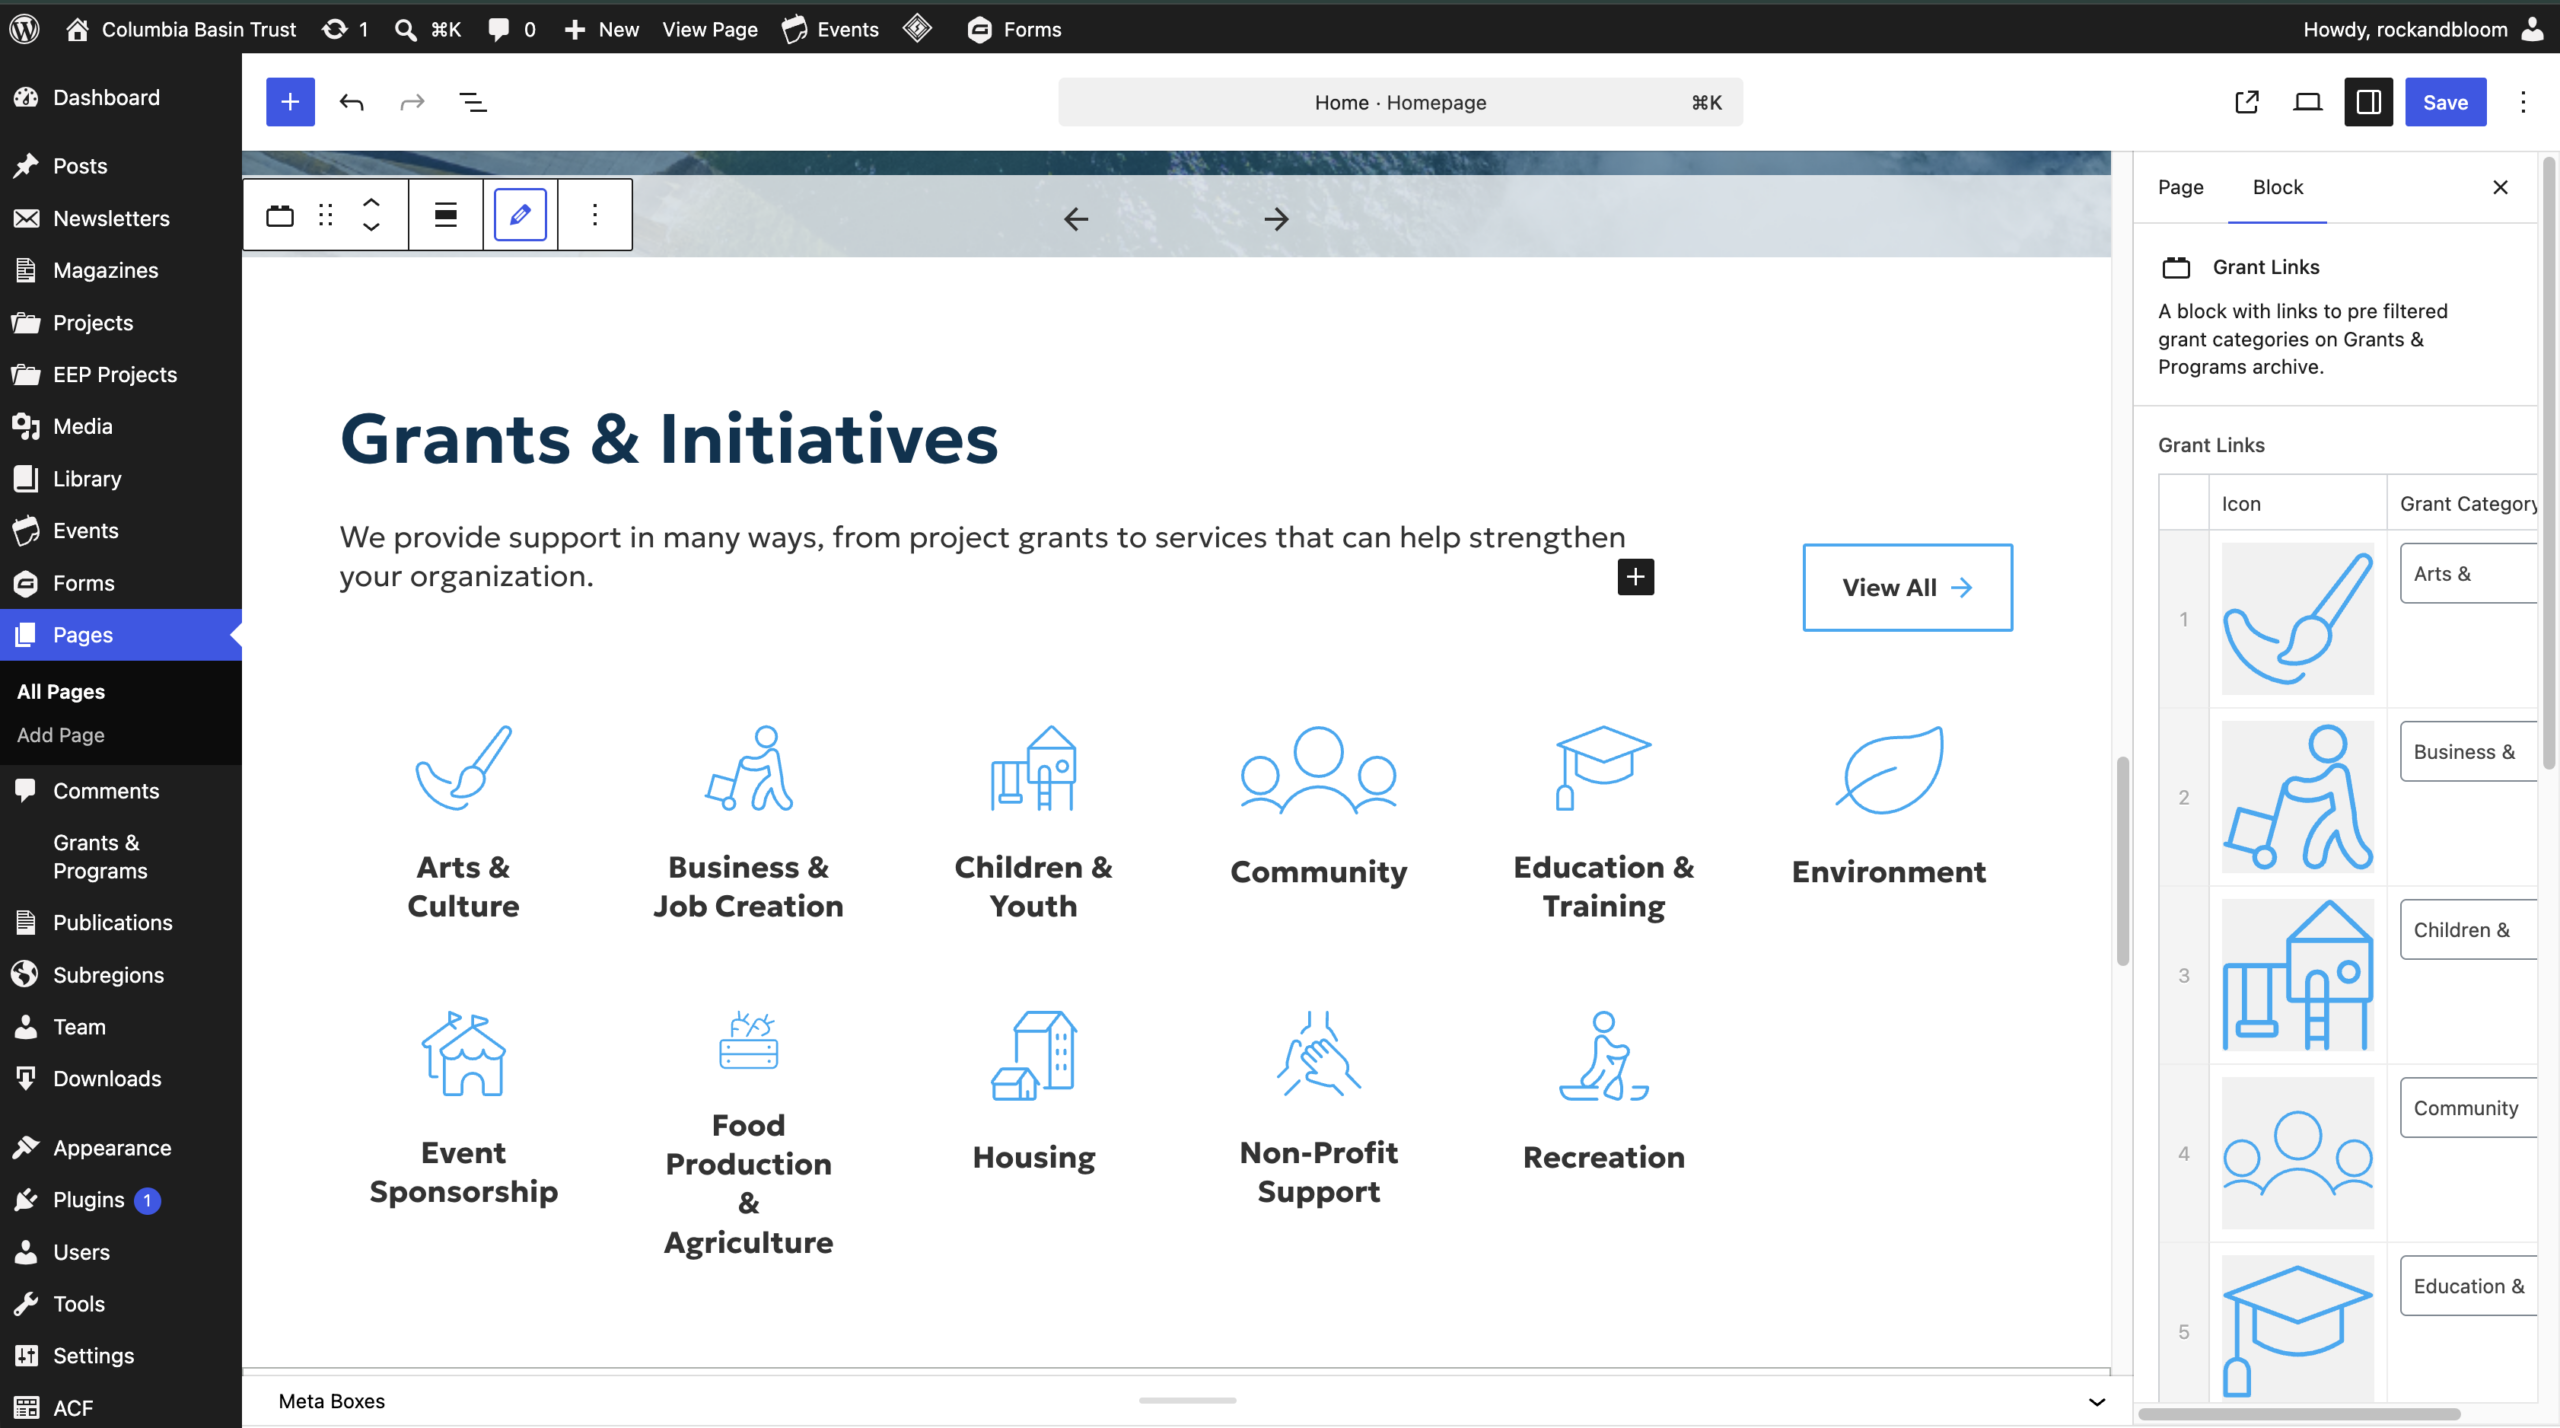
Grant Links
This block requires:
- Icon
- Grant Category
Add more links by clicking the “Add Row” button or “+” beside the row.
Remove a link row by clicking “-“ beside the row
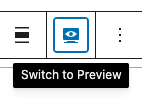
Content: Edit in Preview Mode
- Select the block and select the preview mode option shown above the block.
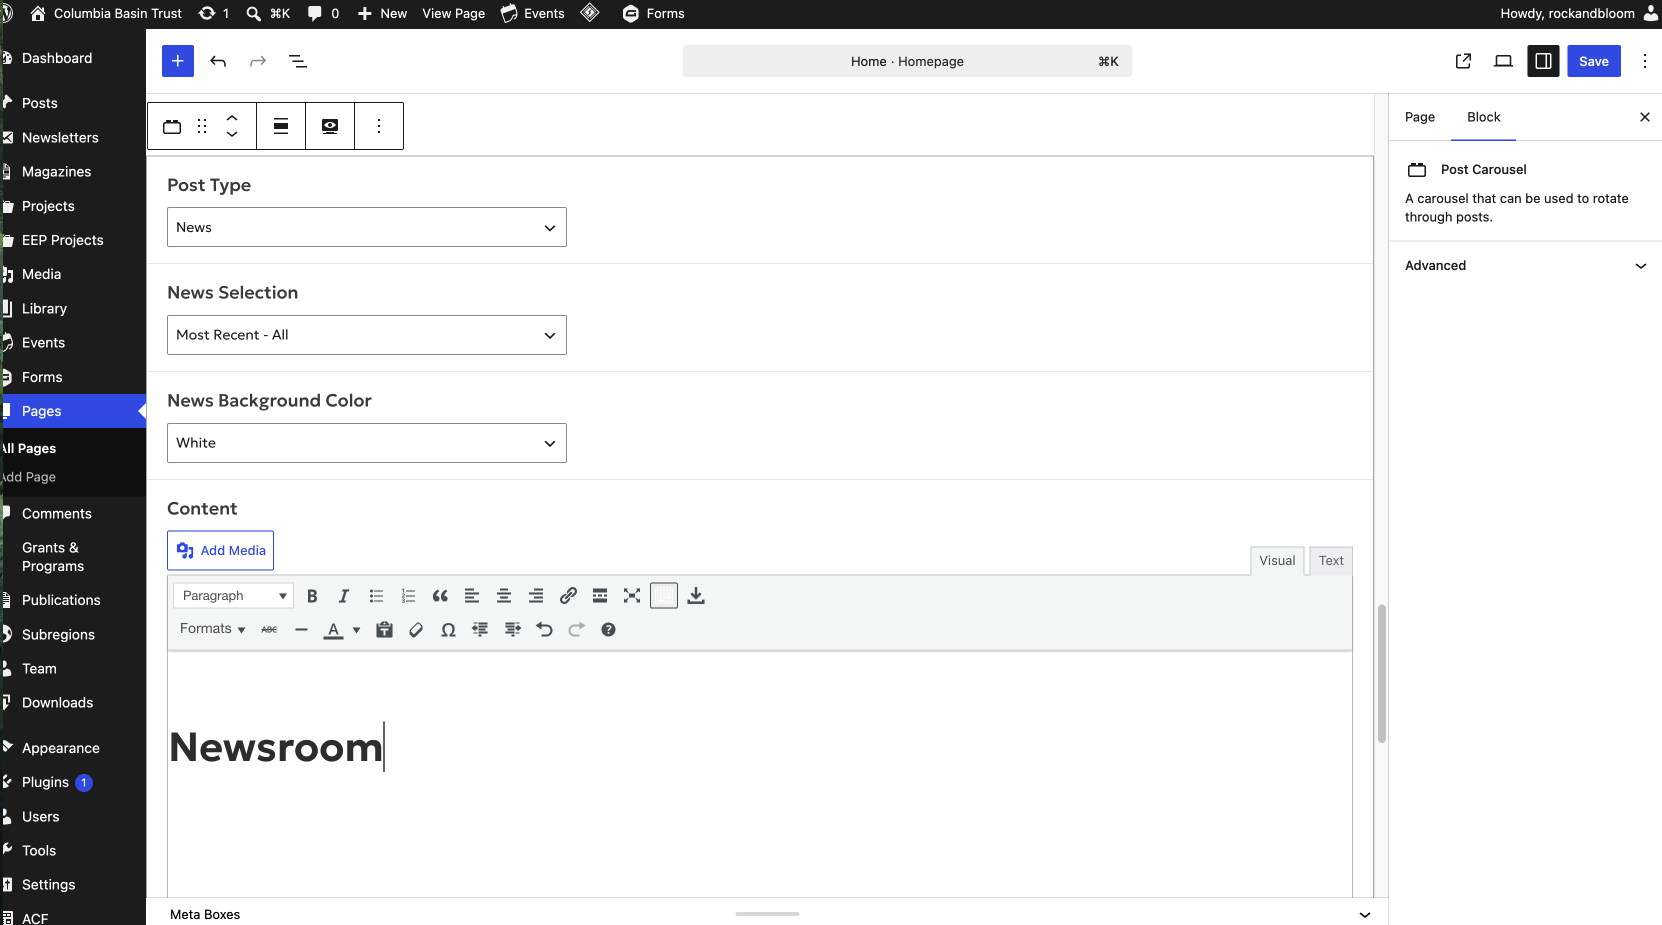
Post Carousel
This block requires:
- Post Type: News or Events
- News Selection
- Most Recent – All
- Most Recent – Category
- Manual Selection
- News Background Color
- Content
- Button
Stats
This block requires:
- Background Color
- Column Count: 2 or 4
- Stat Columns (max 4)
- Stat Prefix
- Stat Vaue
- Stat Suffix
- Stat Content
- Add more stats by clicking the “Add Row” button or “+” beside the row
- Remove a stat row by clicking “-“ beside the row
- Content: Edit in Preview Mode
- Select the block and select the preview mode option shown above the block
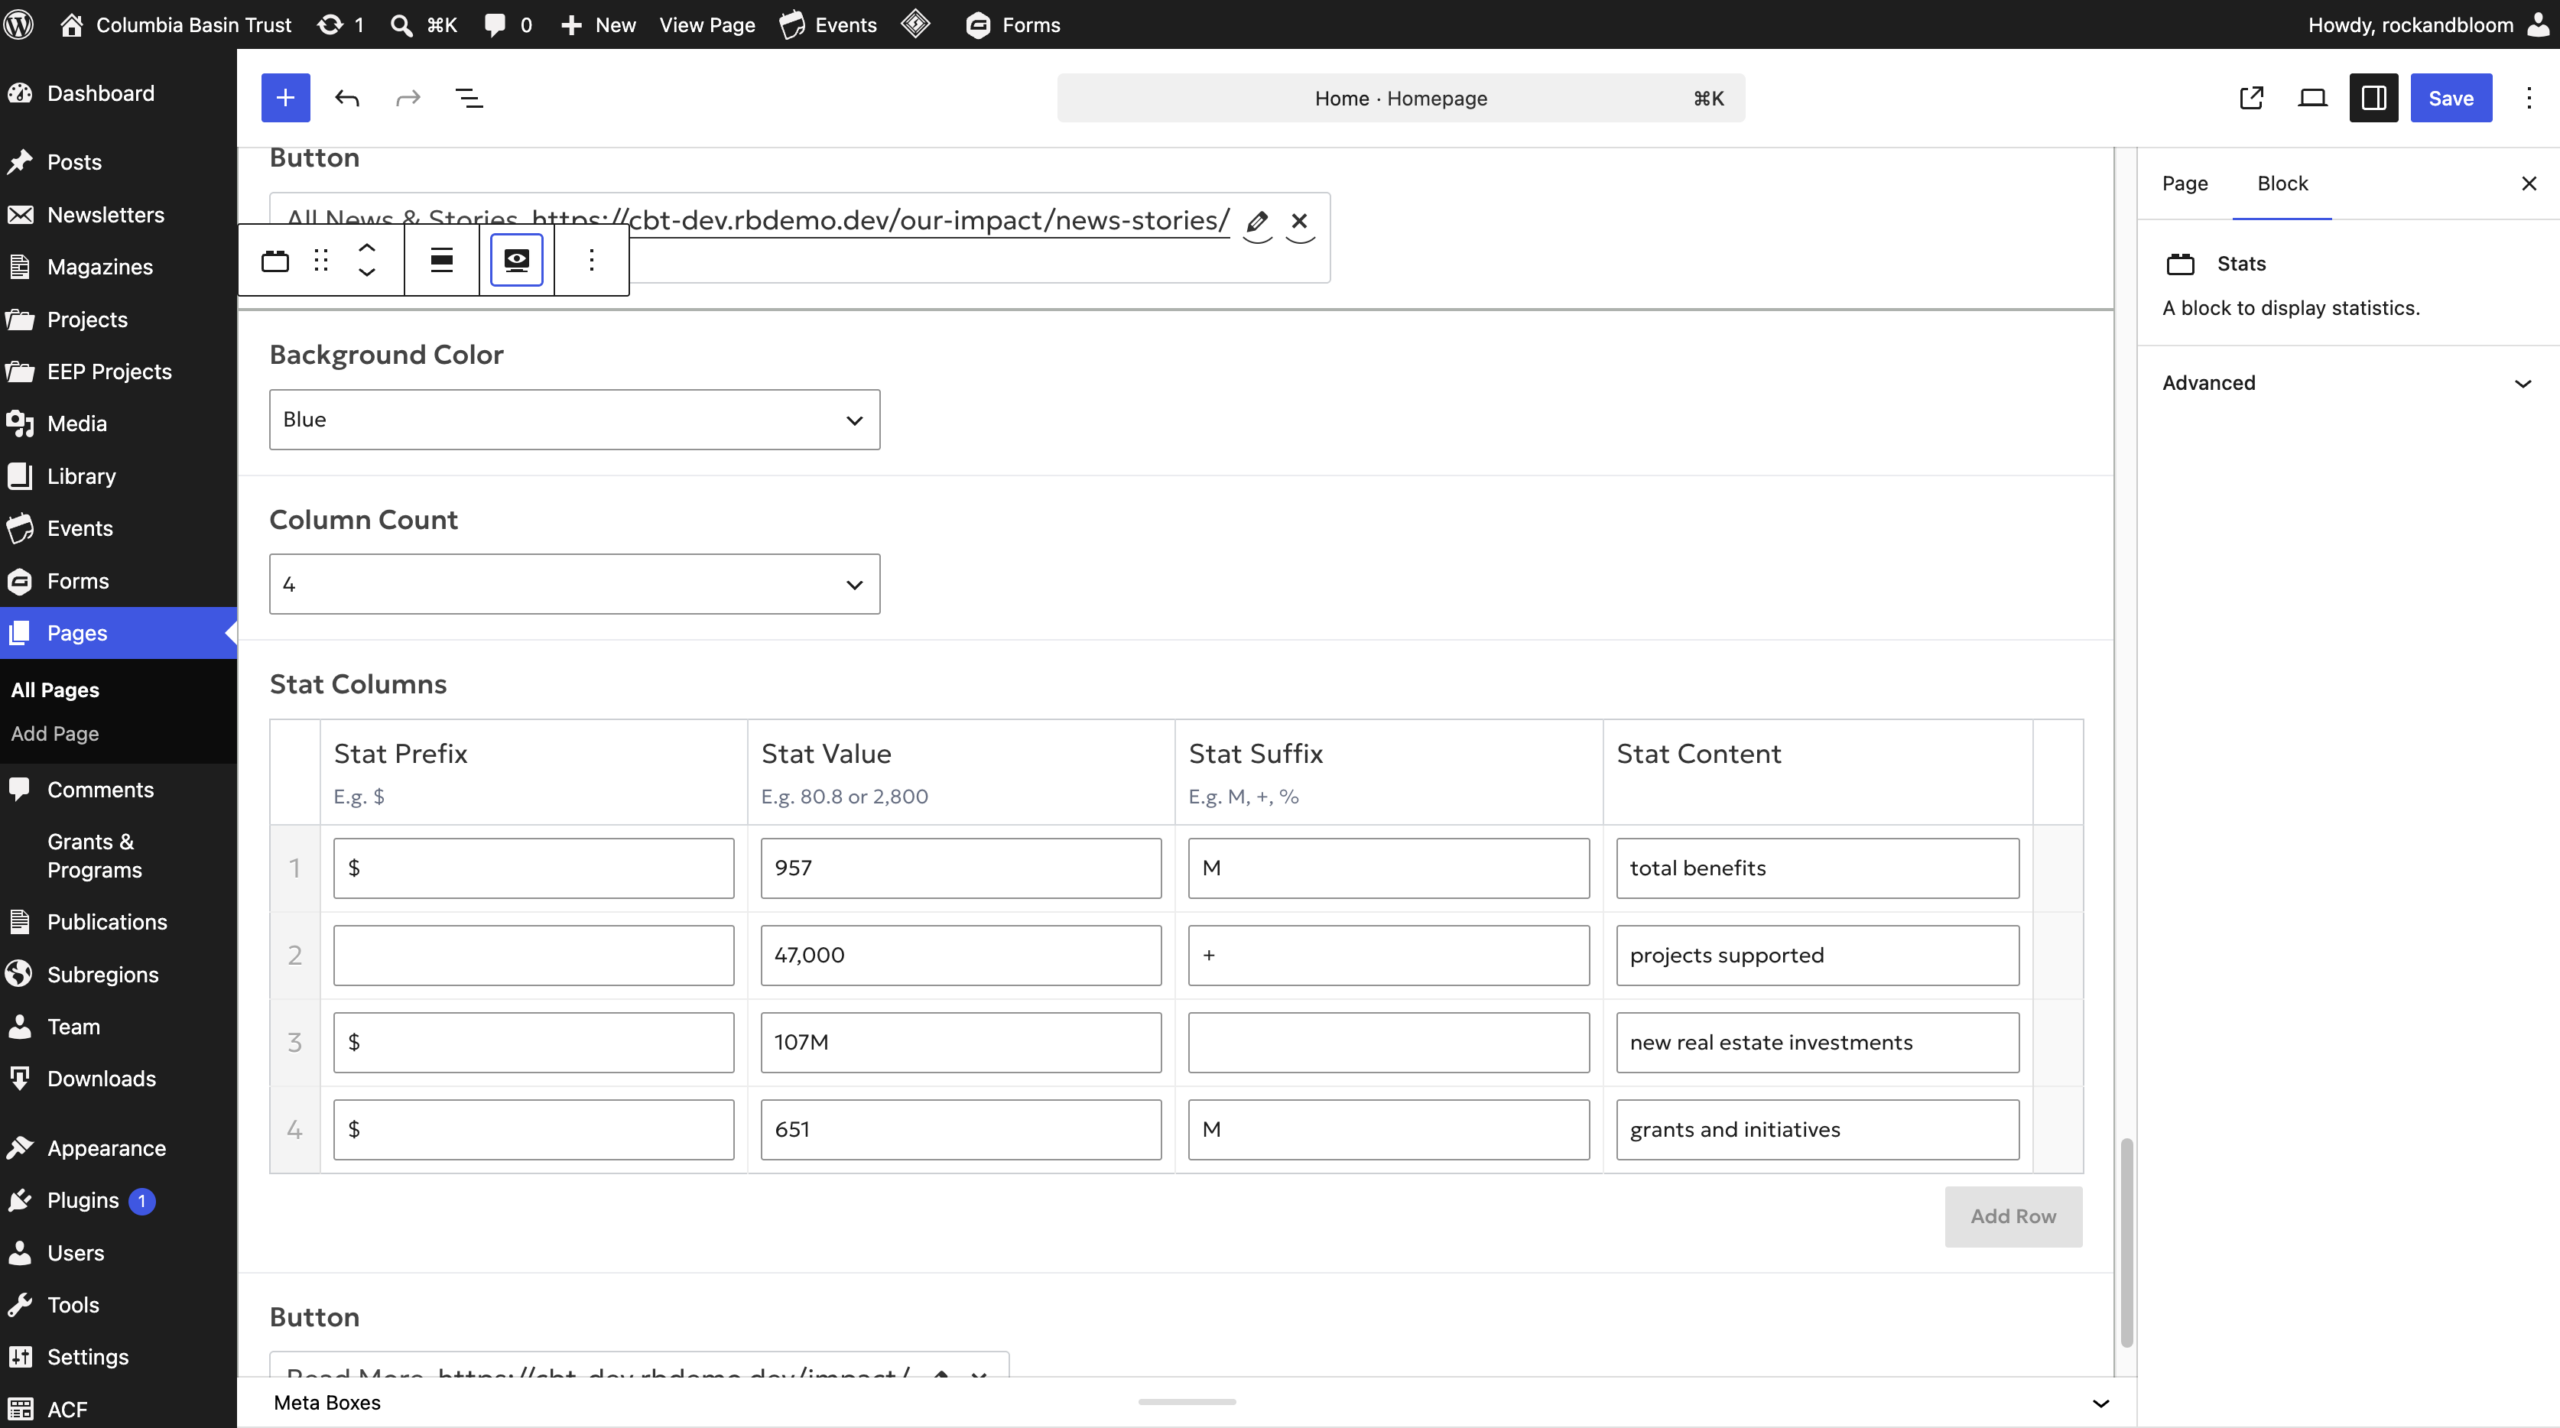
Image & Content
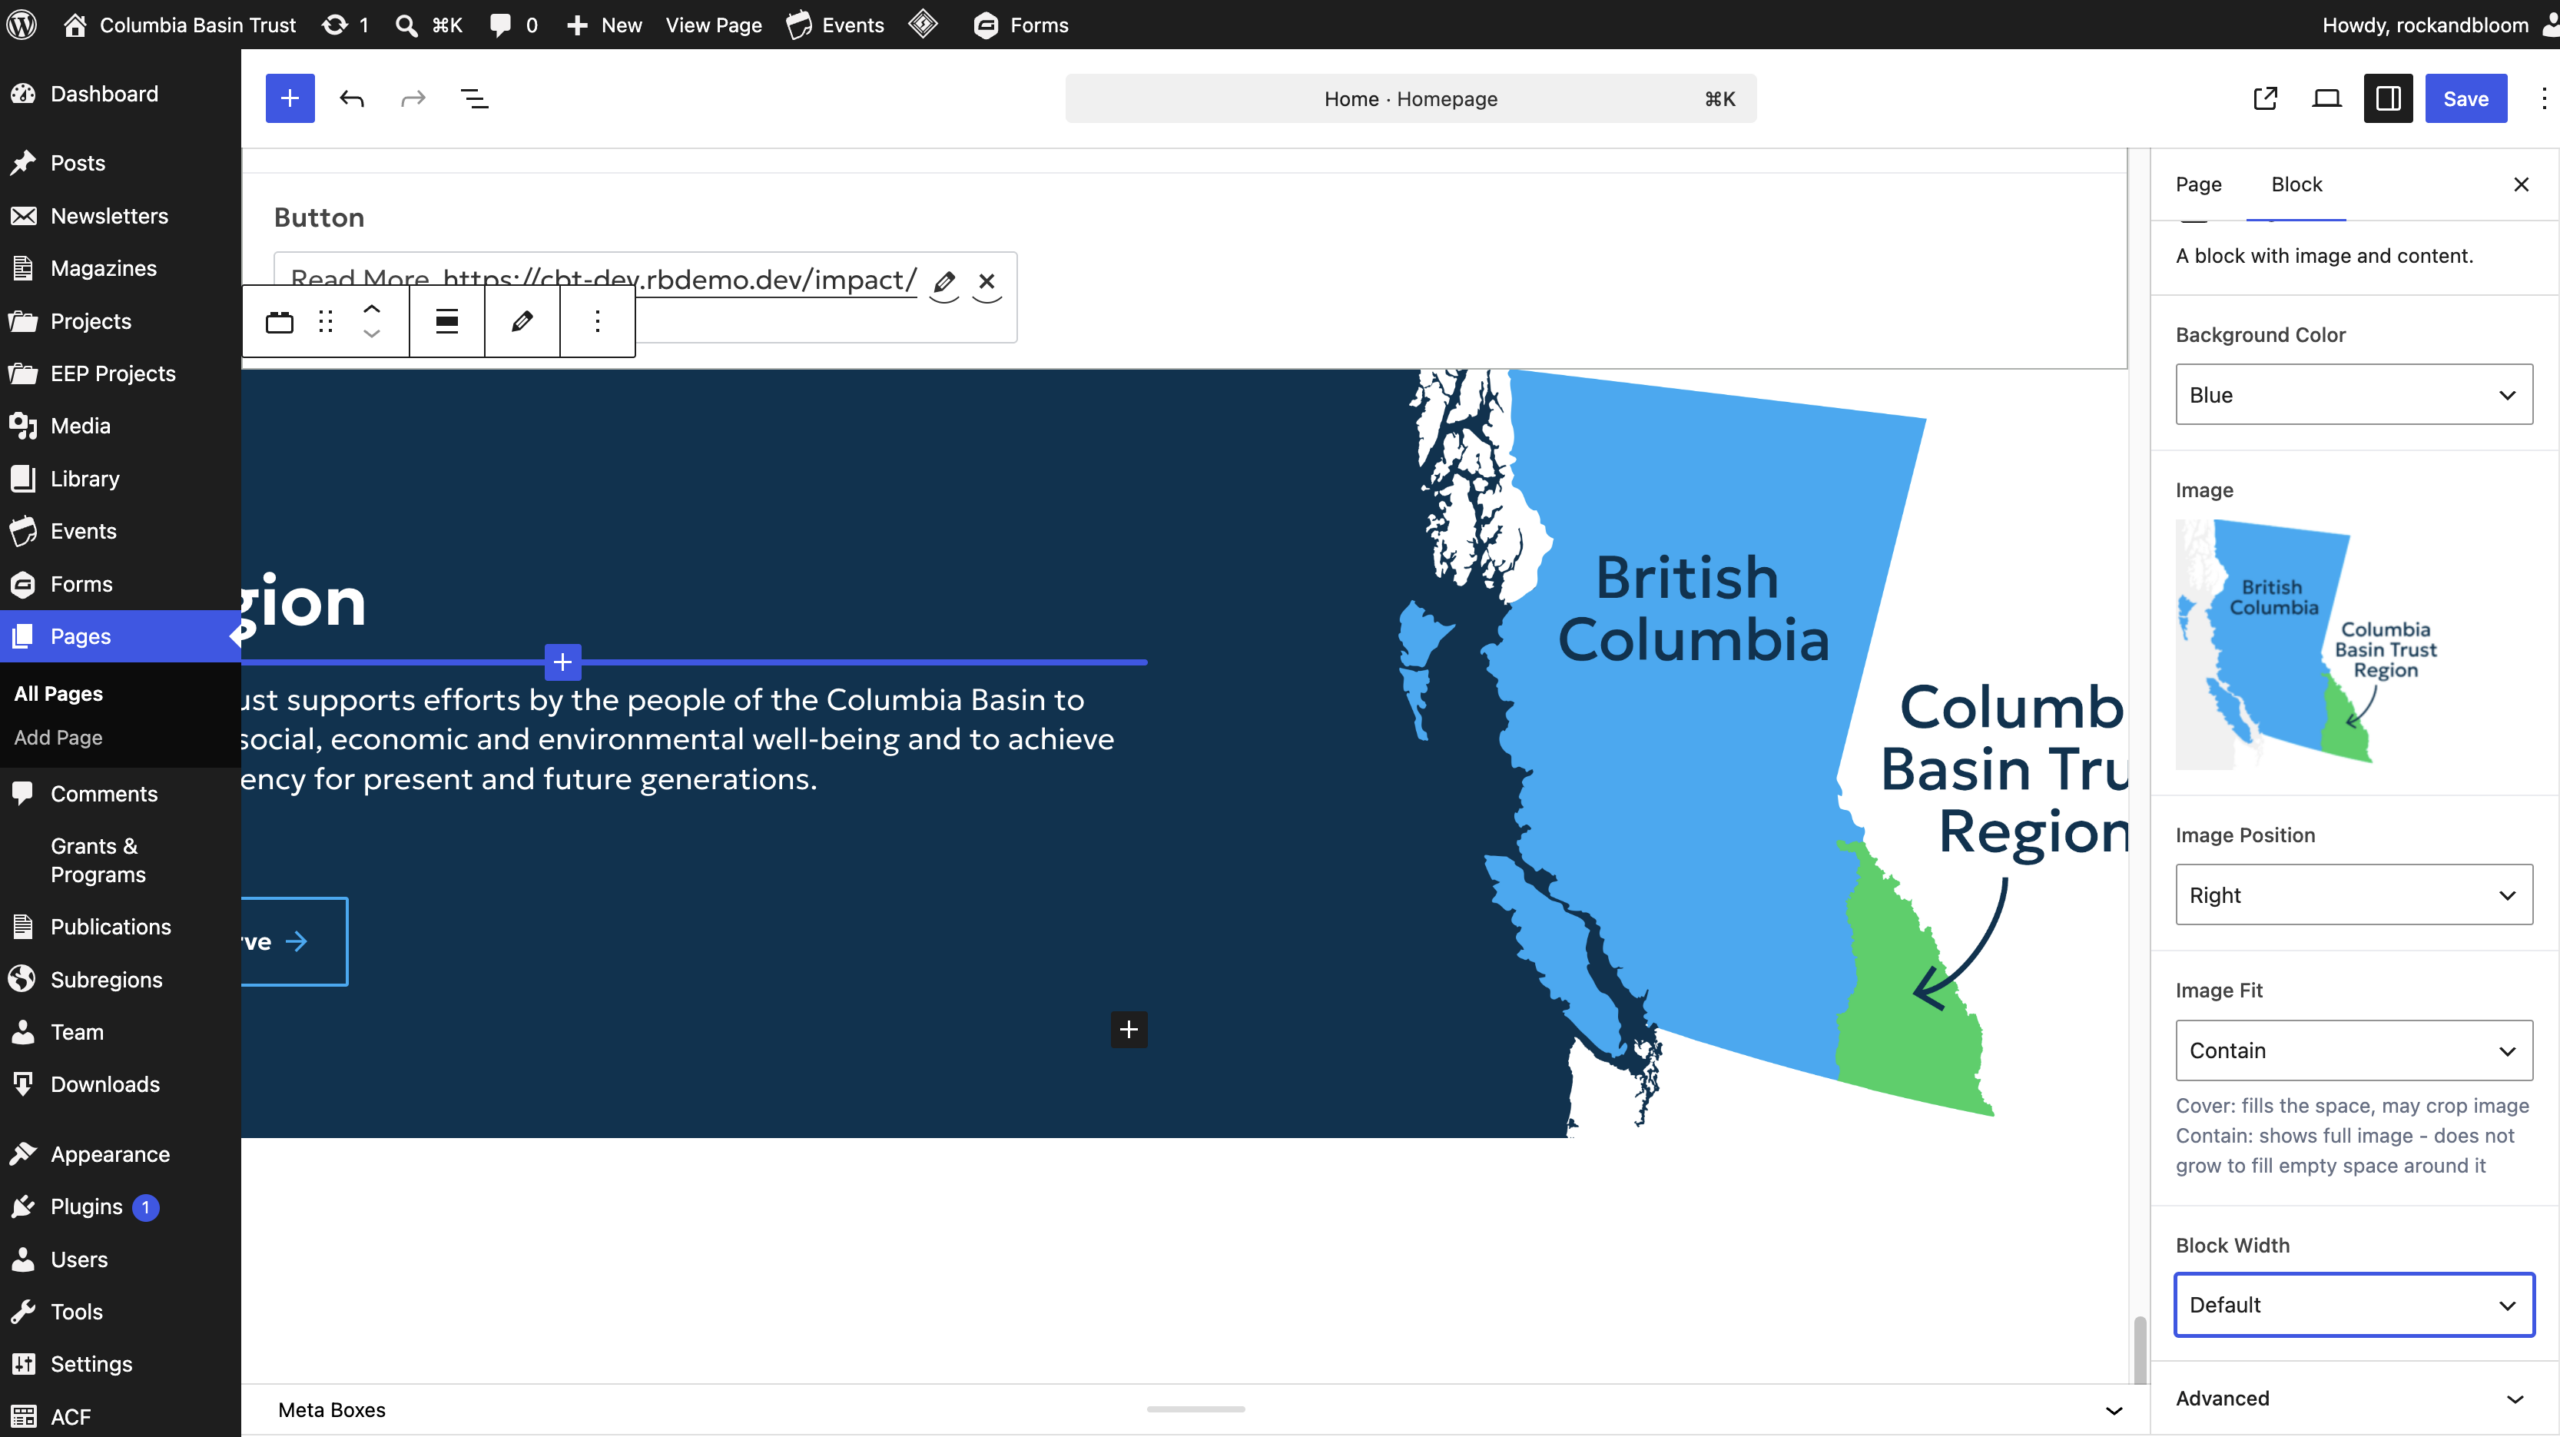
This block requires:
- Background Color
- Image
- Image Position: Left or Right
- Image Fit: Contain or Cover
- Block Width: Default or Narrow
- Content: Edit in Preview Mode
- Select the block and select the preview mode option shown above the block
Accordion Row
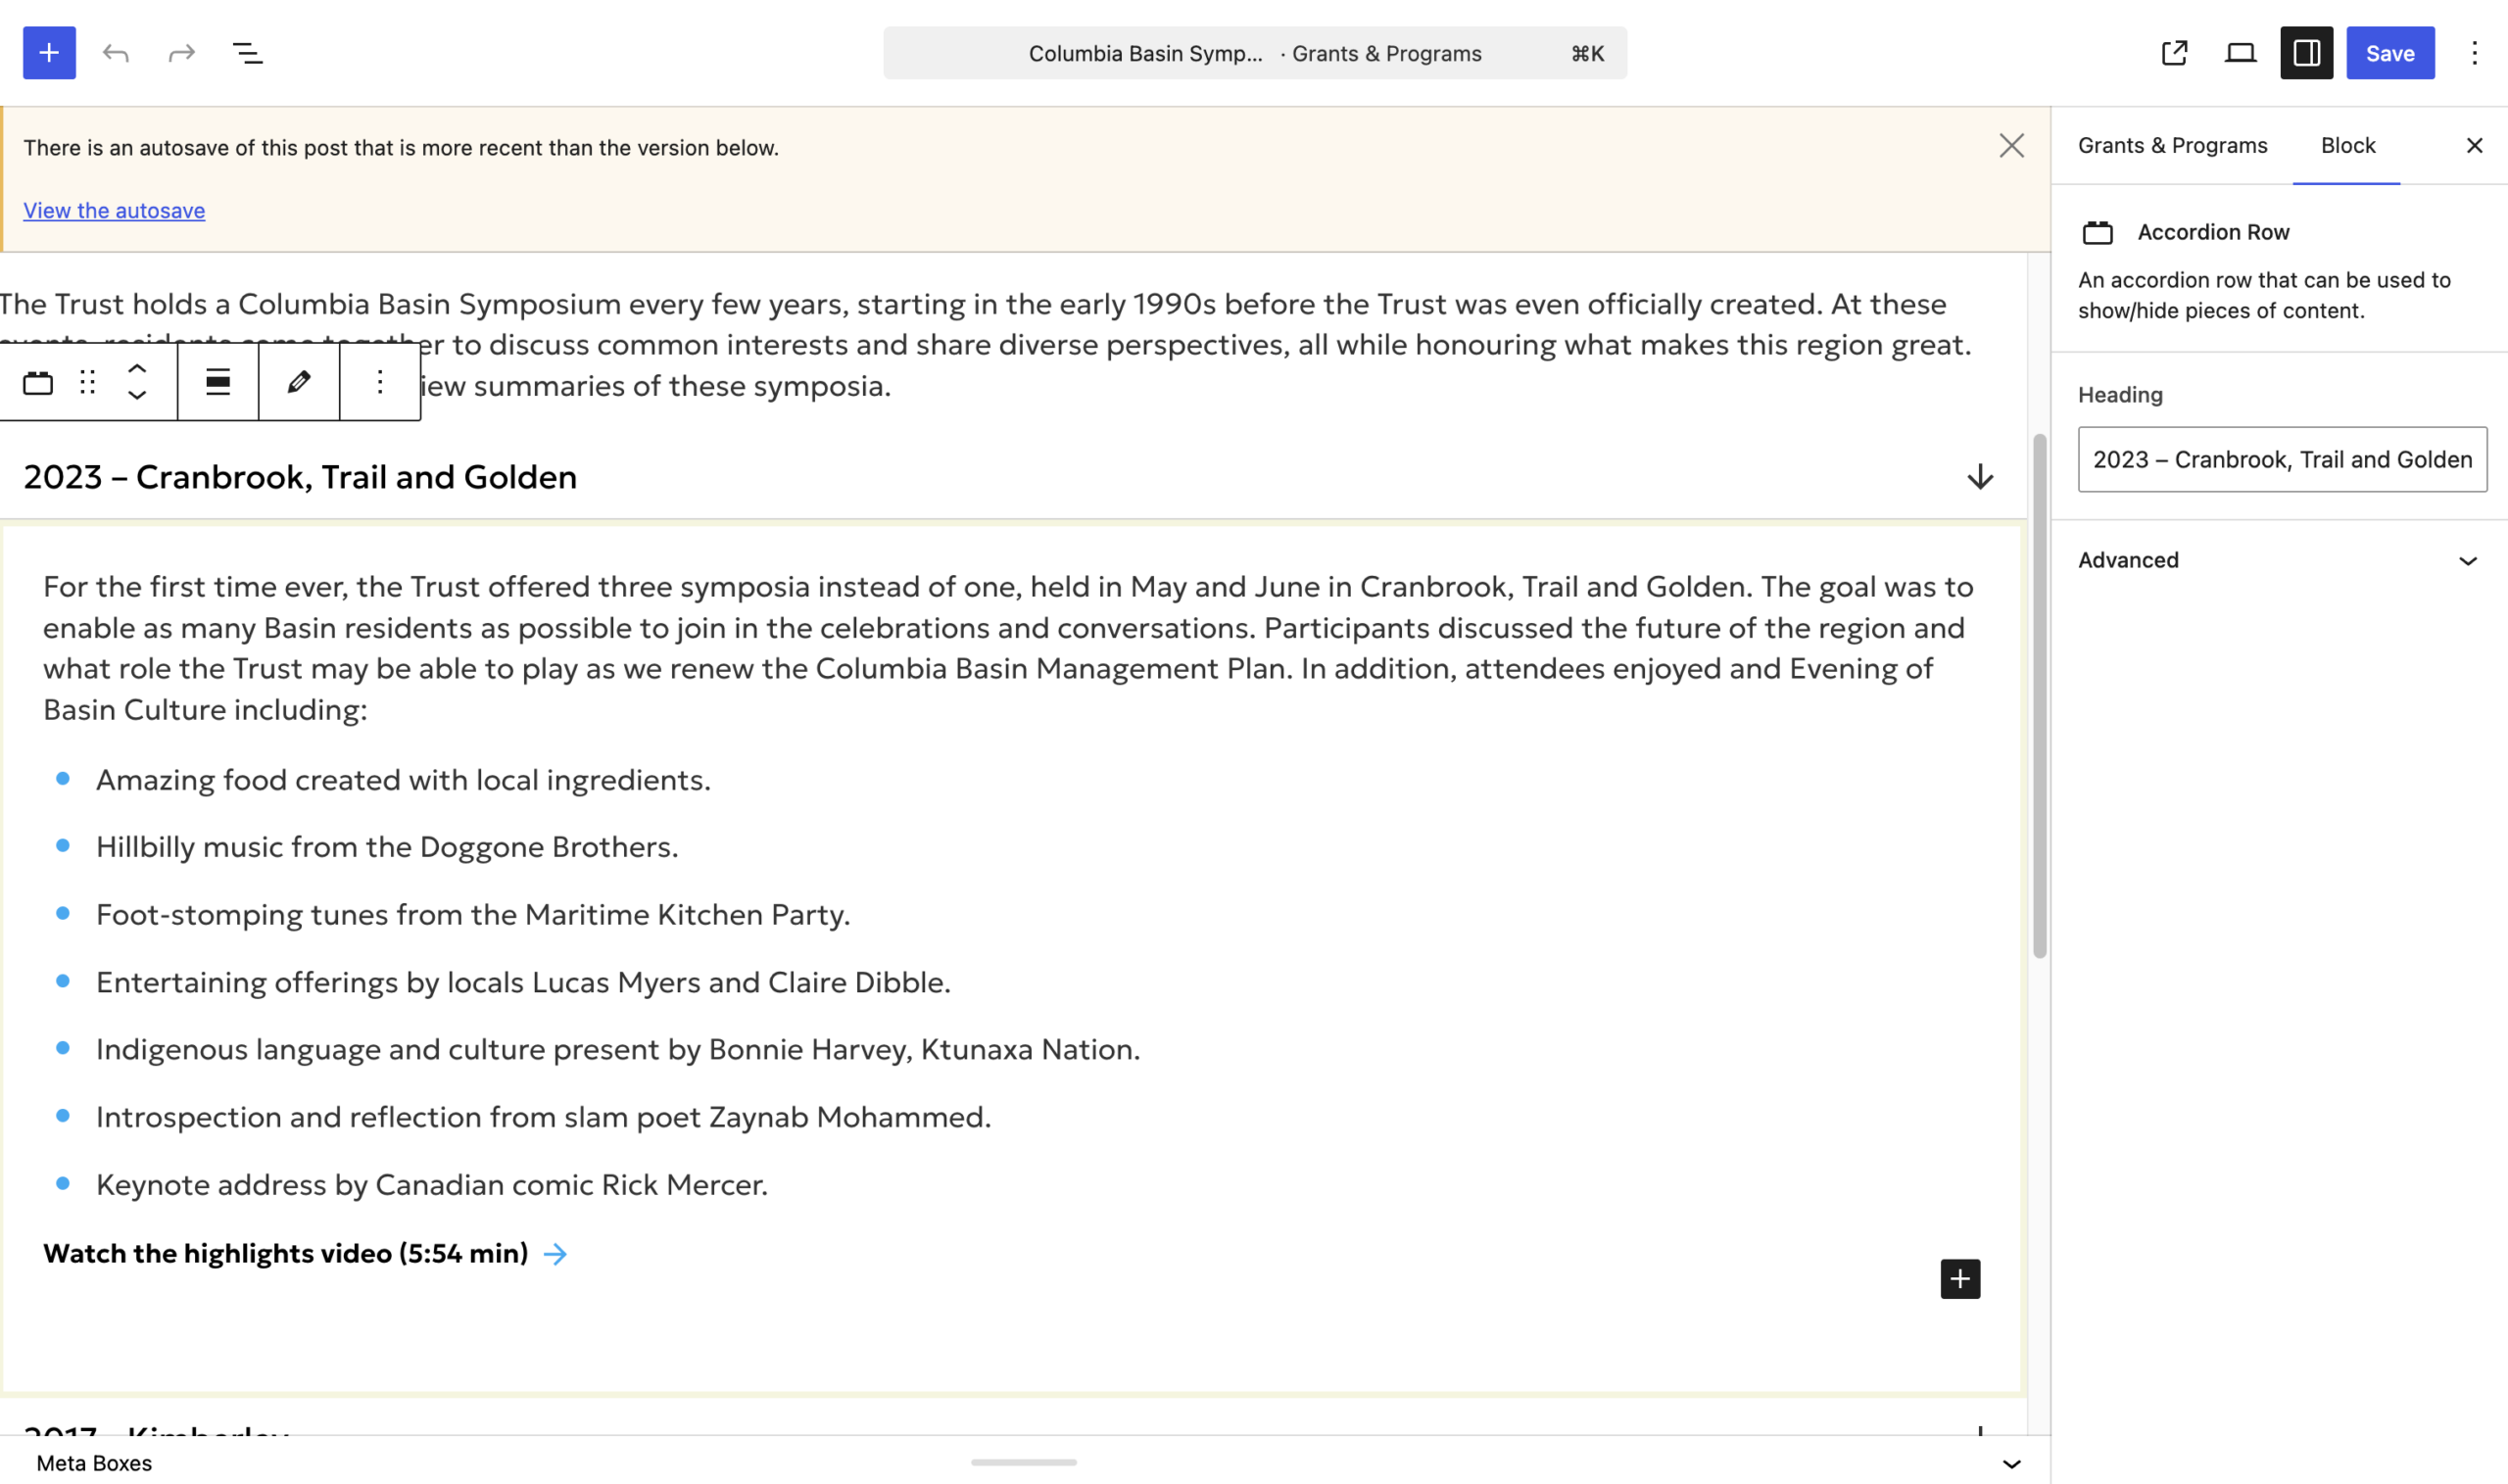
This block requires:
- Heading
- Content: Edit in Preview Mode
- Select the block and select the preview mode option shown above the block
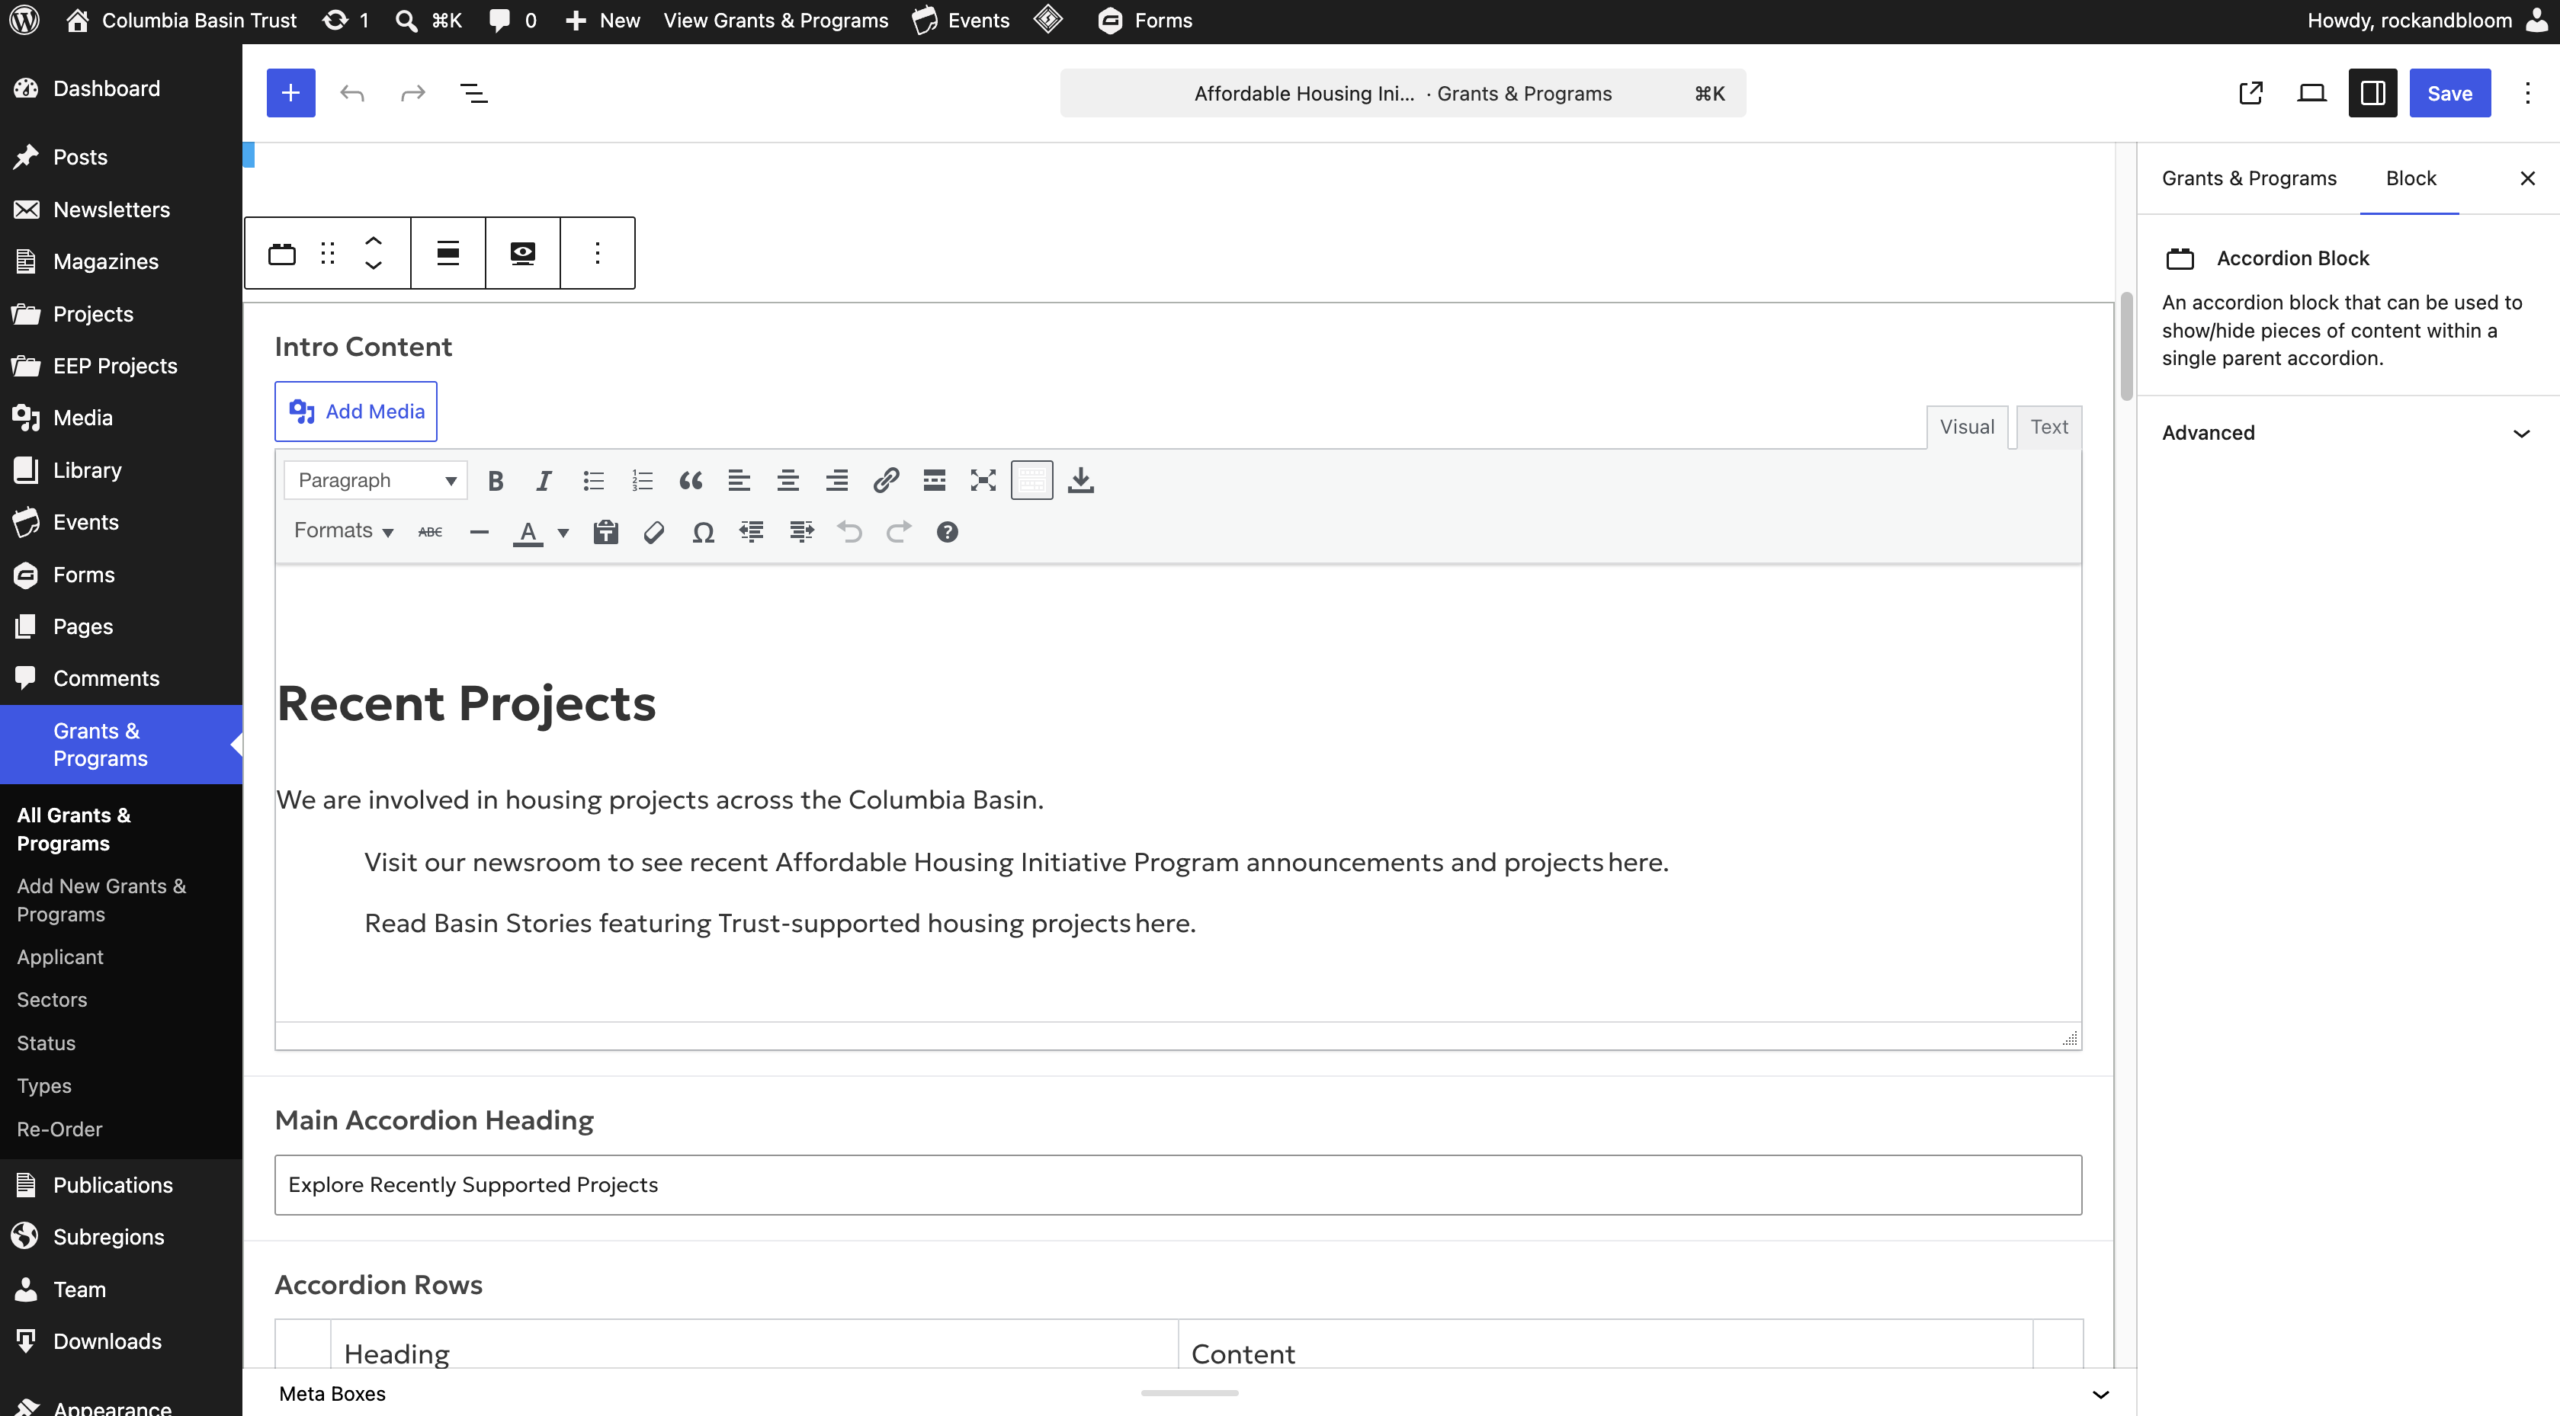
Accordion Block
This block requires:
- Intro Content
- Main Accordion Heading
- Accordion Row
- Heading
- Content
- Add more rows by clicking the “Add Row” button or “+” beside the row
- Remove a row by clicking “-“ beside the row
Team Listing Grid
This block requires:
- Team Members
- Search & select team members
- Can be reordered with drag & drop
- Content: Edit in Preview Mode
- Select the block and select the preview mode option shown above the block
Contact Us
Questions? We’re here to help! Reach out anytime if you need a hand.

Molly Lux
Account Manager/Director
molly@rockandbloom.com

Meg Wilken
Creative Operations
meg@rockandbloom.com